- Published on
Deploying OpenClaw the Easy, Free, and Secure Way: In an Isolated Environment
What Is OpenClaw, and Why Should You Care?
If you've been anywhere near the AI-assisted security tooling space recently, you've probably heard of ClawdBot, an AI-powered agent that can interact with your system, run commands, browse files, write scripts, and assist with offensive and defensive security workflows.
OpenClaw is the open-source version of ClawdBot. It gives you essentially the same capabilities: a self-hosted AI agent with system-level access, without being locked into a proprietary platform or paying recurring subscription fees. You bring your own model (Qwen, DeepSeek, Ollama-hosted models, etc.), and OpenClaw becomes your personal AI assistant running entirely on your infrastructure.
That last part is important: entirely on your infrastructure. You own the data, you own the environment, and you control what the agent can and cannot do.
The Problem: Why Not Just Run It Directly?
Here's the thing. ClawdBot (and by extension, OpenClaw) is designed to have broad system-level access. It can execute shell commands, read and write files, manage processes, and interact with your OS in ways most applications never need to.
If you install it directly on your main machine, your daily driver, you're essentially giving an AI agent the keys to your entire system. One misconfigured prompt, one hallucinated rm -rf, and your day gets a lot worse.
Some people solve this by buying dedicated hardware: a Mac Mini, a spare laptop, or even racking a small server just for this purpose. That works, but it's expensive. A Mac Mini will set you back 800 minimum, and that's before you factor in maintenance, power draw, and the hassle of managing another physical device.
We're going to skip all of that.
The Solution: Docker. Isolation Without the Price Tag
Instead of dedicating hardware, we'll use Docker to spin up an isolated container that runs OpenClaw in its own sandboxed environment.
The biggest win here is security through isolation. The container gets its own filesystem, its own process space, and zero direct access to your host unless you explicitly allow it. If something breaks inside the container, your host stays completely clean. And the cost? $0. You're running it on the machine you already own. No new hardware required.
Beyond security, you also get reproducibility. If anything goes wrong, you tear down the container and spin up a fresh one in seconds. No reinstalling, no cleanup, no residual config files scattered across your system. And because Docker works the same way on Kali, Ubuntu, Debian, Fedora, and pretty much any Linux distro, the whole setup is portable too. You can even migrate it to a VPS later if you want remote access.
Think of it this way: instead of buying a separate computer for the AI agent to live on, you're giving it a virtual room inside your existing machine, with walls it cannot break through.
Prerequisites
Before we dive in, make sure you have a Linux-based system (this walkthrough uses Kali Linux, but any Debian/Ubuntu-based distro works. Fedora and Arch are fine too with minor adjustments). You'll also need Docker installed, though if you don't have it yet, don't worry. The installer script we're about to use will detect that and handle it for you.
You'll need an internet connection to pull the Docker image and authenticate with your chosen AI model provider, and a model provider account with API access or an auth token for whichever model you want to use (Qwen, DeepSeek, etc.). Many of these have generous free tiers, so this doesn't necessarily cost anything either.
Step 1: Grab the Installer from the Repository
We're going to use a community-maintained repository that wraps the entire OpenClaw Docker deployment into a single install script. No manual Dockerfile writing, no docker-compose configuration, no figuring out volume mounts or port bindings yourself.
The repository is here:
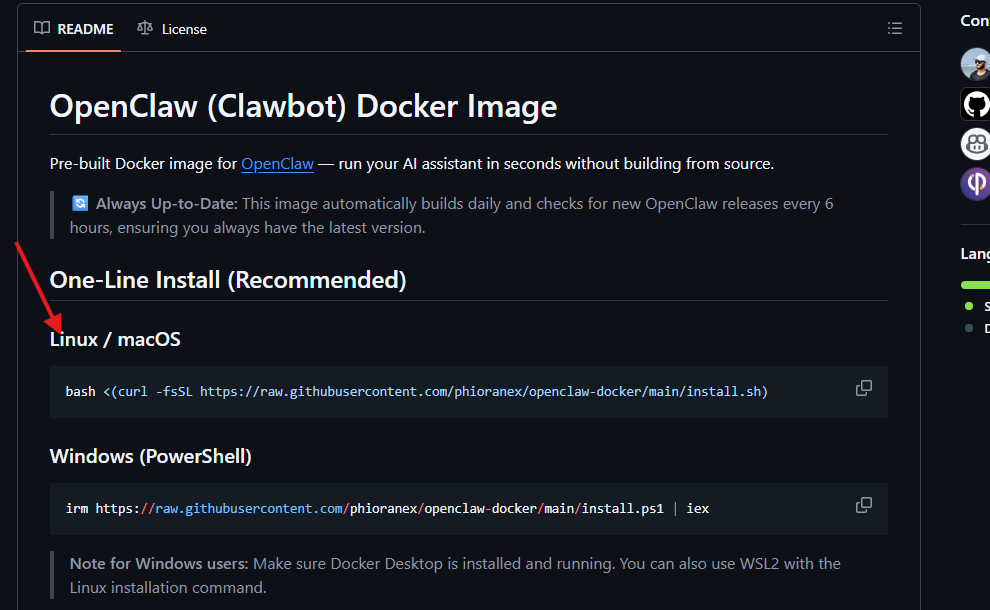
Head over to the repo and look at the README. You'll find a one-liner install command. This is the only command you need to run. The script does the rest: it checks your system for dependencies, installs anything that's missing, pulls the correct Docker image, and walks you through the initial configuration.
Step 2: Run the Install Script
Copy the one-liner from the repository's README and paste it into your terminal.
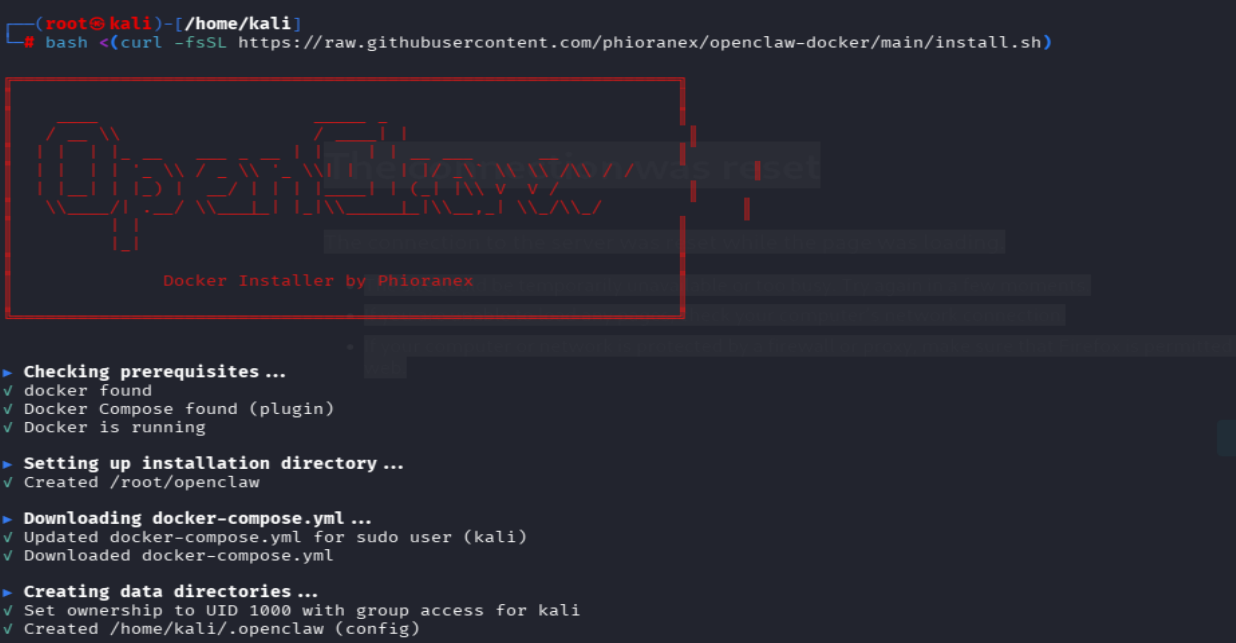
Once you hit Enter, the script kicks off. Here's what's happening behind the scenes:
- Dependency check: The script scans your system for everything OpenClaw needs: Docker, curl, jq, and a few other utilities. If anything is missing, it installs it automatically using your system's package manager.

- Docker image pull: Next, it pulls the official OpenClaw Docker image from the container registry. This is the pre-built environment that contains the OpenClaw server, all its runtime dependencies, and the web UI, all packaged into a single image.
The beauty of this approach is that you don't need to understand Docker internals. You don't need to write a Dockerfile, pick a base image, or figure out which ports to expose. The script handles all of that. You just run it and answer a few prompts.
Step 3: Choose Your AI Model
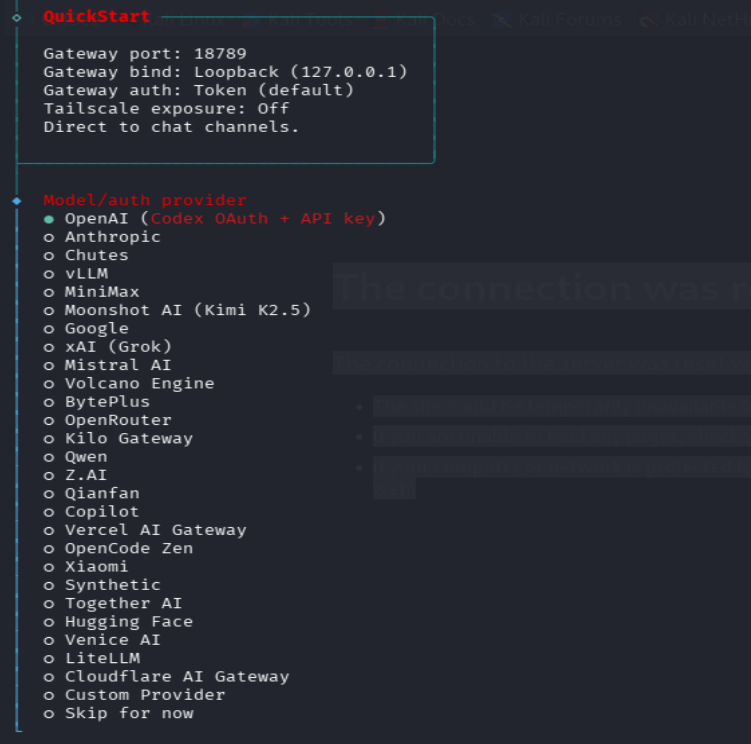
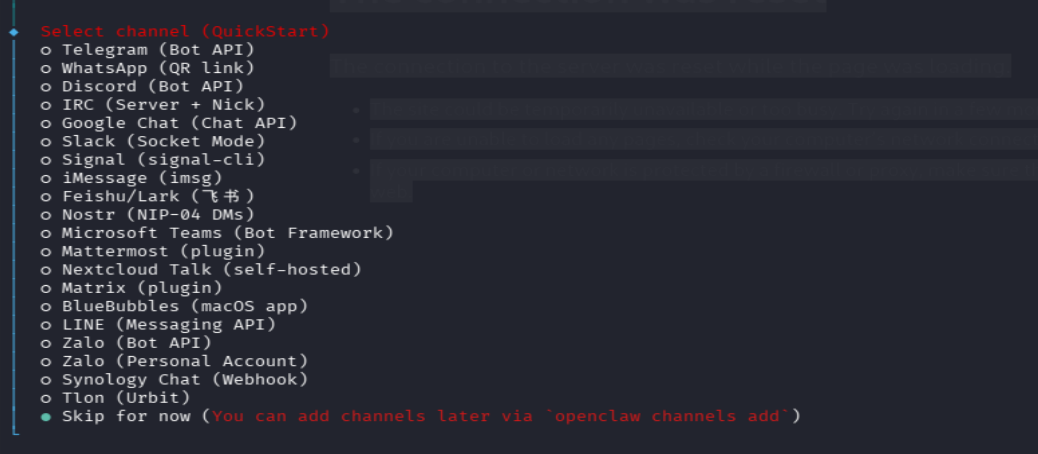
This is where it gets interesting. OpenClaw is model-agnostic. It doesn't lock you into a single AI provider. During the setup process, the installer will present you with a list of supported models.
Pick the one that fits your situation. Qwen is a solid general-purpose model with a generous free tier, and that's what we used for this walkthrough. DeepSeek is strong at code generation and reasoning tasks if that's more your focus. And if you want to go fully local and run the model on your own GPU with zero external API calls, Ollama-hosted models are the route to take.
For this walkthrough, we went with Qwen. It's free to get started, performs well for security-related tasks, and the authentication flow is straightforward.
The model you choose here isn't permanent. You can always swap it later by re-running the installer.
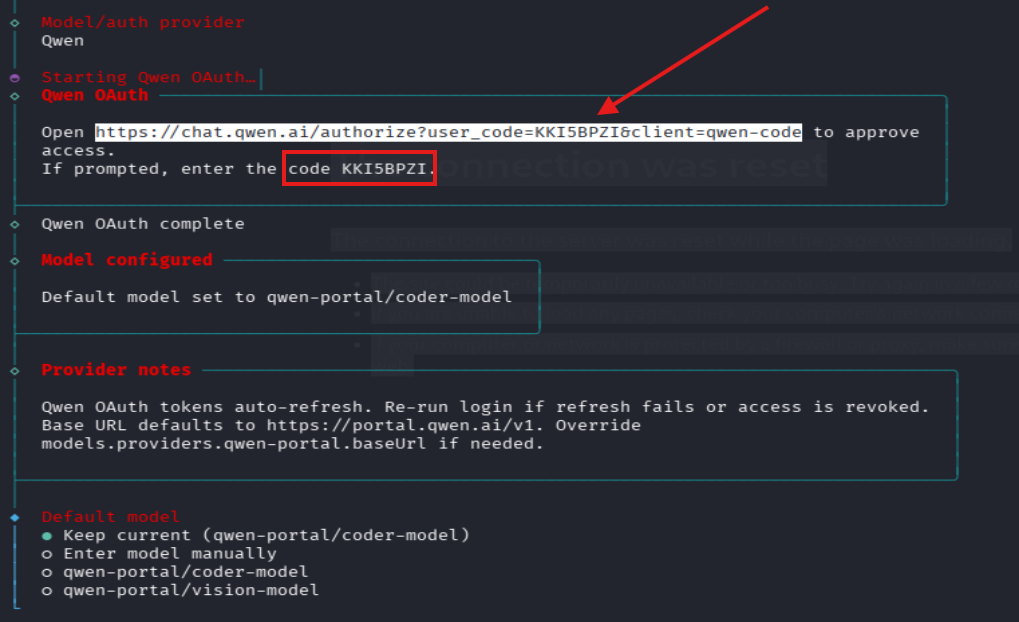
Step 4: Authenticate with Your Model Provider
After selecting a model, the installer needs to link your OpenClaw instance to the provider's API. Depending on which model you chose, this works slightly differently, but the general flow is the same. The installer will display a URL highlighted in your terminal. Open that URL in your browser, log in to your model provider's dashboard, and approve the connection. In some cases, instead of browser approval, you'll see a verification code in the terminal that you need to enter on the provider's website.
This step is what authorizes your self-hosted OpenClaw instance to make API calls to the model. Without it, OpenClaw won't be able to generate responses. Make sure you complete this before moving on. The installer will wait for confirmation.
Step 5: Handle Optional Configuration
After authentication, the installer presents a handful of additional settings, things like MCP integrations, tool permissions, and extended agent behaviors.
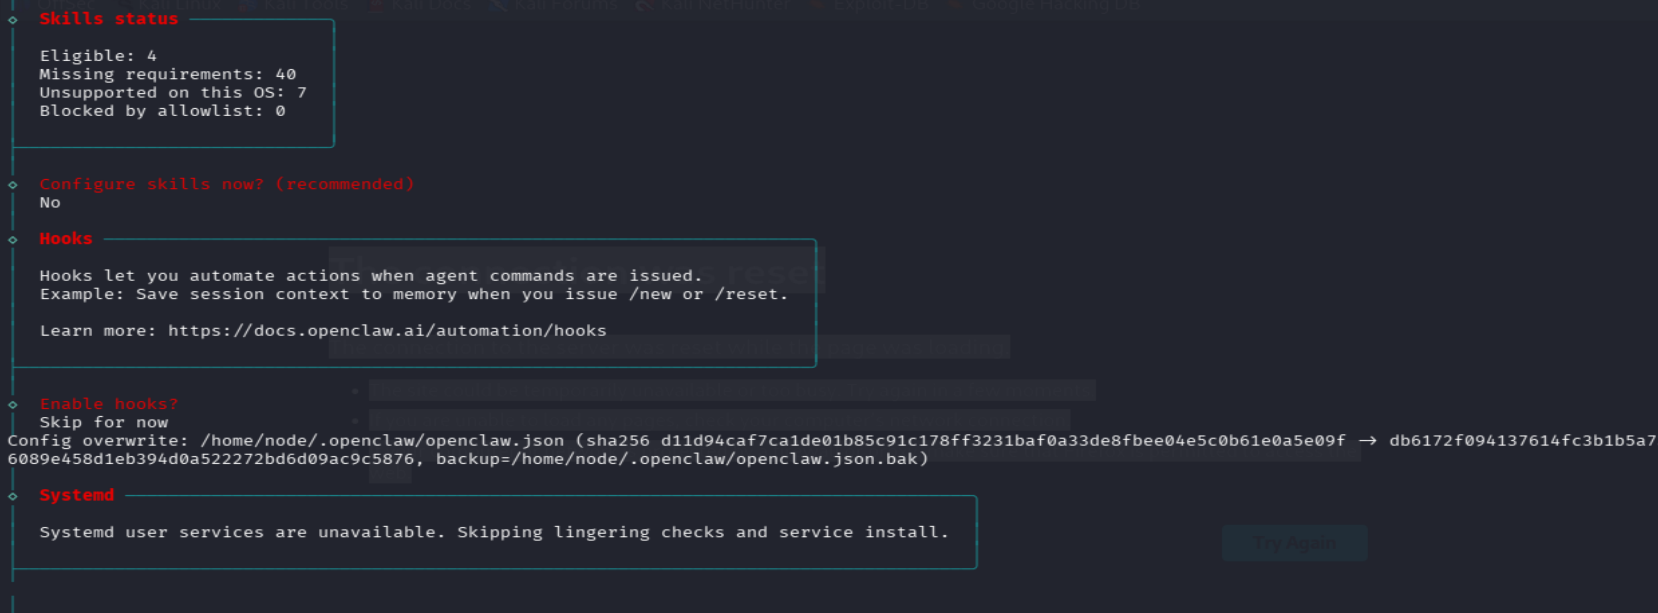
For a first-time setup, you can safely skip all of these. They're quality-of-life options that you can revisit once you've got the basics running. The defaults are sensible and won't leave your instance in a broken state.
That said, if you plan to use OpenClaw for serious work later on (e.g., connecting it to GitHub repos, enabling file system access to specific host directories, or integrating with external APIs), this is where you'll come back to configure those capabilities.
Step 6: Access OpenClaw in Your Browser
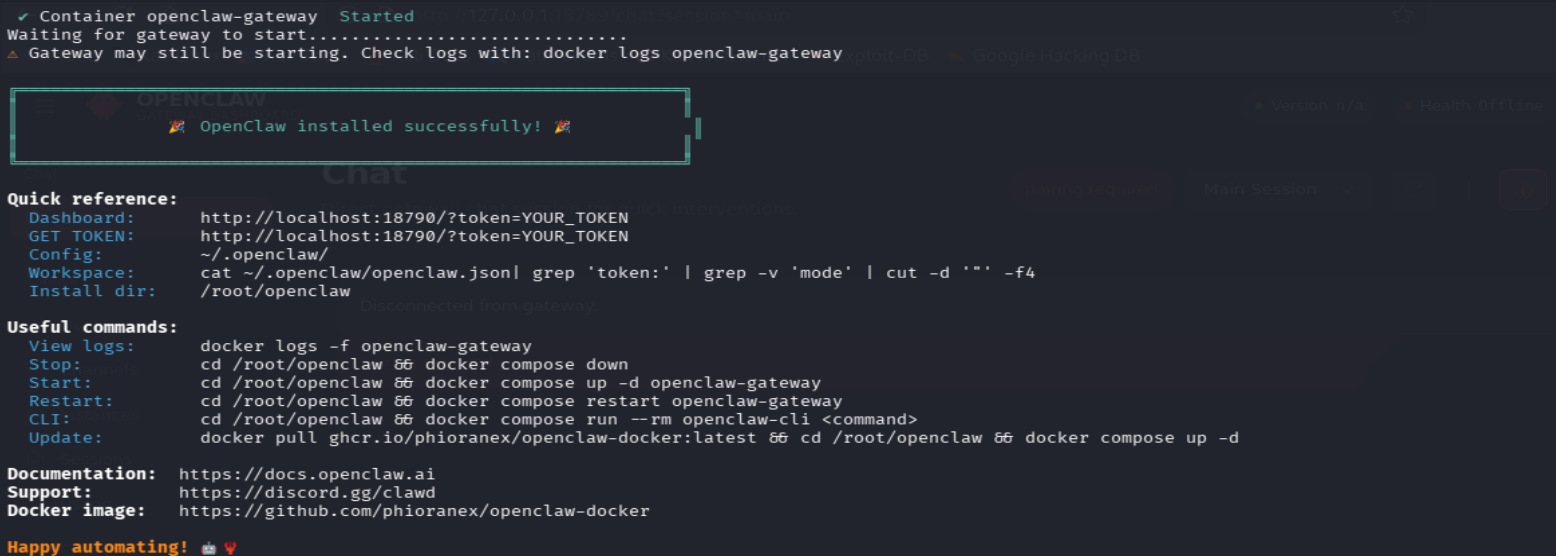
Once the script finishes, OpenClaw is live. It's running inside a Docker container on your machine, and the web interface is accessible on localhost.
But before you can log in, you need the authentication token. The installer generates this automatically and writes it to a file on your system. You can grab it with:
cat /home/kali/.openclaw/openclaw.json
Look for the token field in that JSON file. Copy the value and paste it into the browser when the login screen asks for it.
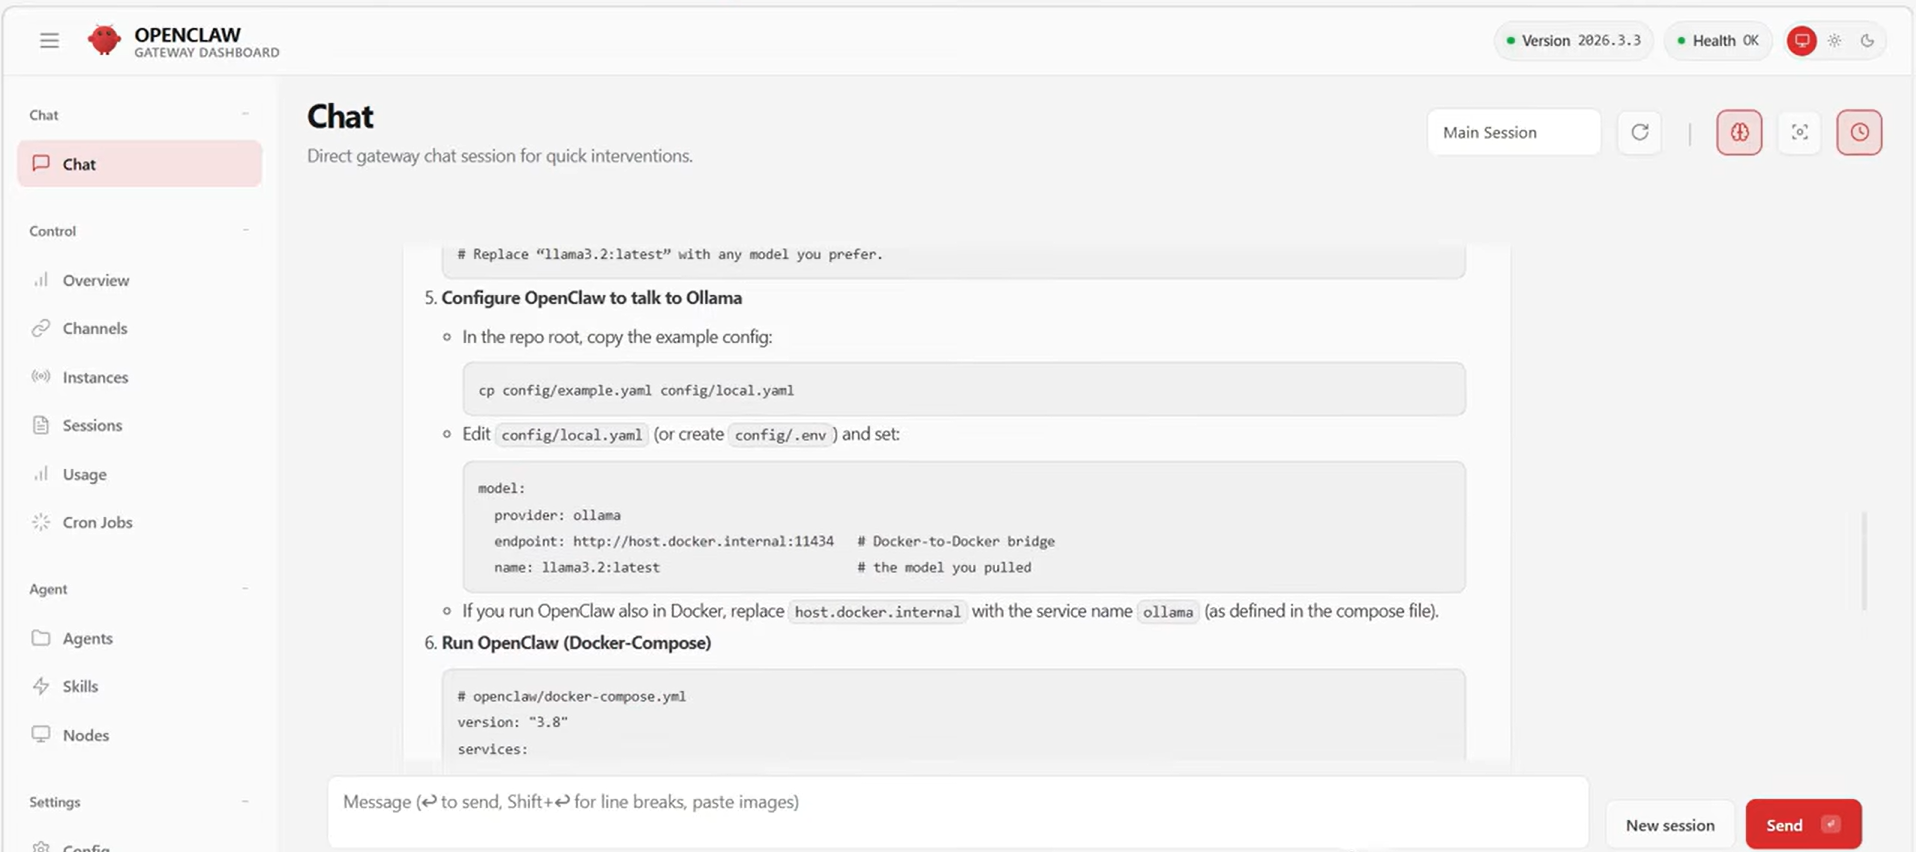
And that's it. You're in. OpenClaw is running in an isolated Docker container, connected to your chosen AI model, and accessible through a clean web interface on your local machine.
What You've Actually Built Here
Let's take a step back and appreciate what just happened. You deployed a fully functional, self-hosted AI agent, for free. It's running inside a Docker container, completely isolated from your host operating system. You didn't buy a Mac Mini, rent a VPS, or deal with any complex infrastructure. The entire setup took one command and a few prompts. And if you ever want to get rid of it, a quick docker stop and docker rm and it's gone. No traces left on your host.
What's Next?
Now that OpenClaw is running, there's plenty worth exploring. You can swap models on the fly by re-running the installer and picking a different provider. Want to test DeepSeek's reasoning against Qwen's? Go for it. You can also go back and configure integrations from Step 5, connecting OpenClaw to your GitHub repos, granting it scoped file access, or hooking it up to external APIs.
If you want to access OpenClaw from anywhere (not just your local machine), you can move to a VPS. Spin up a cheap one, install Docker, and run the same one-liner. Everything works identically. And keeping things up to date is just as easy: pull the latest Docker image to grab new features and security patches. The container approach makes updates trivial.
If you run into issues or have questions, feel free to reach out to us at Shellvoide.
Happy hacking.