- Published on
AWS Client VPN with SSO (Interactive Setup Guide)
AWS Client VPN is a managed, OpenVPN-based remote access service that lets users securely connect to private AWS networks from anywhere. It is designed for teams that need controlled access to internal workloads without exposing private resources directly to the internet.
In many environments, the challenge is not creating a VPN tunnel, it is managing identity, access scope, and onboarding at scale. That is where integrating AWS Client VPN with IAM Identity Center (SSO) becomes valuable.
This guide walks through the end-to-end setup so users can authenticate with corporate identities, download configuration from the self-service portal, and access only the VPC resources they are authorized to use.
Why This Approach Matters
Instead of sharing static certificates or manually distributing profiles, this model gives you identity-based access with centralized group control in IAM Identity Center. You can apply least privilege through authorization rules and simplify user onboarding with the self-service portal.
If your team needs auditable, group-driven VPN access that scales cleanly, this is a practical production baseline.
Who This Guide Is For
- Cloud engineers setting up user VPN access with SSO
- Teams replacing shared certificates with identity-based access
- Anyone documenting a production-ready AWS Client VPN rollout
What You Will Build by the End
By the end of this guide, you will have:
- One AWS Client VPN endpoint authenticated by SAML (IAM Identity Center)
- One self-service portal app for user profile downloads
- Group-based authorization using IAM Identity Center groups
- End-to-end user login via browser-based SSO
Quick Navigation
- Architecture at a Glance
- Prerequisites
- Step 1: Create SSO App for Client VPN
- Step 2: Create SSO App for Self-Service Portal
- Step 3: Create IAM SAML Identity Providers
- Step 4: Create Client VPN Endpoint
- Step 5: Associate Target Network
- Step 6: Create Group and Authorization Rule
- Step 7: Assign Applications to Group
- Step 8: End-User Connection Flow
- Validation Checklist
- Troubleshooting
- FAQ
Architecture at a Glance
- IAM Identity Center hosts two SAML applications:
- Client VPN authentication app
- Client VPN self-service portal app
- IAM receives each app metadata as a separate SAML identity provider.
- Client VPN endpoint uses those providers for login and self-service.
- Access is limited by an authorization rule mapped to an Identity Center group.
Prerequisites
- AWS account with permissions for:
- AWS IAM Identity Center
- AWS IAM
- AWS Client VPN
- ACM
- VPC
- A VPC with at least one subnet
- A server certificate in ACM for the Client VPN endpoint
- AWS Client VPN desktop client installed (for end-user testing)
Setup Progress Tracker
Use this as you go:
- Step 1 complete (Client VPN SAML app)
- Step 2 complete (Self-service SAML app)
- Step 3 complete (IAM SAML providers)
- Step 4 complete (Client VPN endpoint)
- Step 5 complete (Target network associated)
- Step 6 complete (Group + authorization rule)
- Step 7 complete (Apps assigned)
- Step 8 complete (User connection tested)
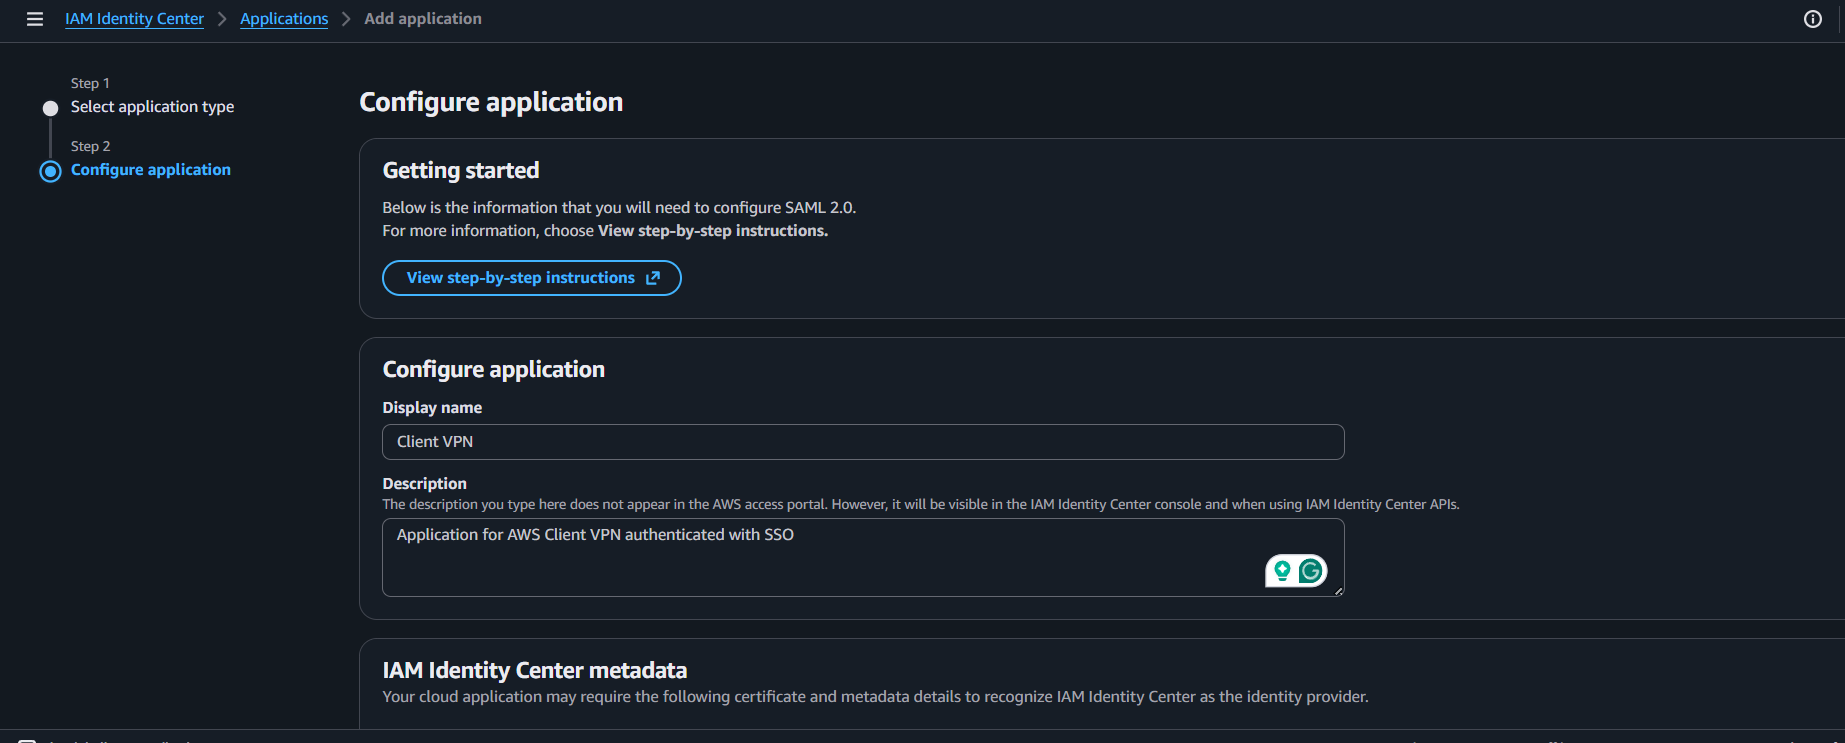
Step 1: Create SSO App for Client VPN
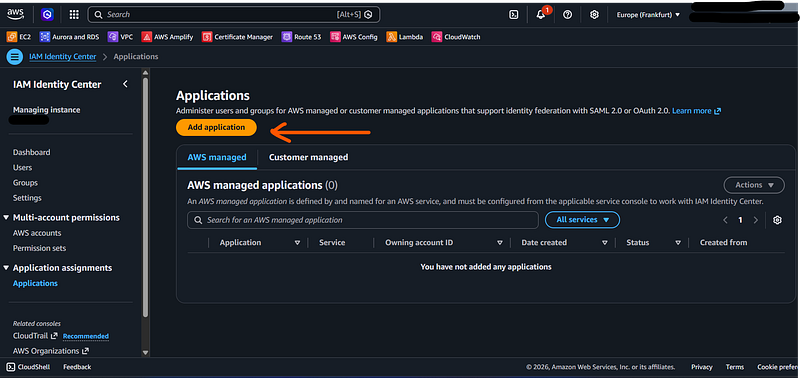
Go to AWS IAM Identity Center -> Applications.
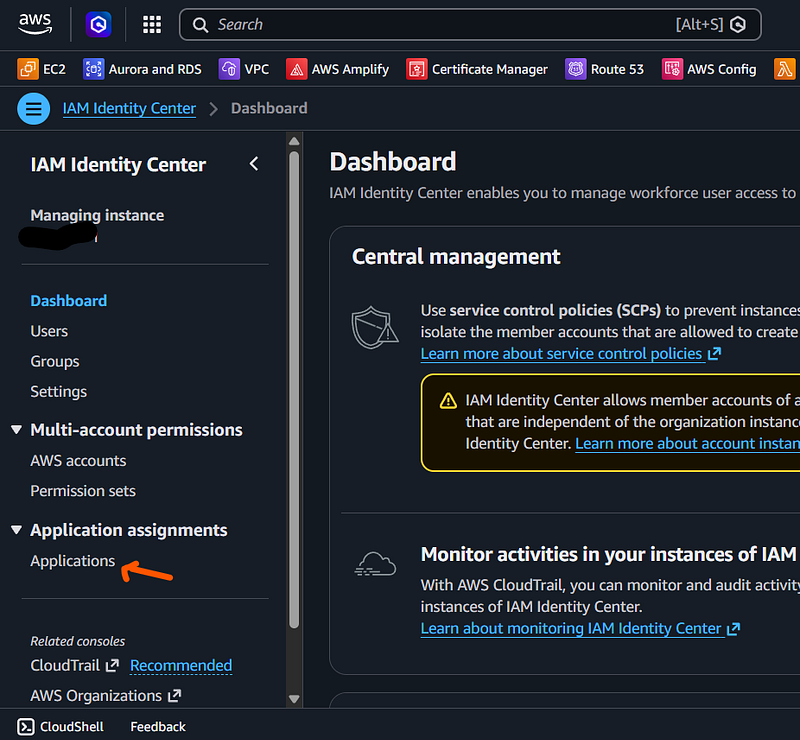
Click Add application.
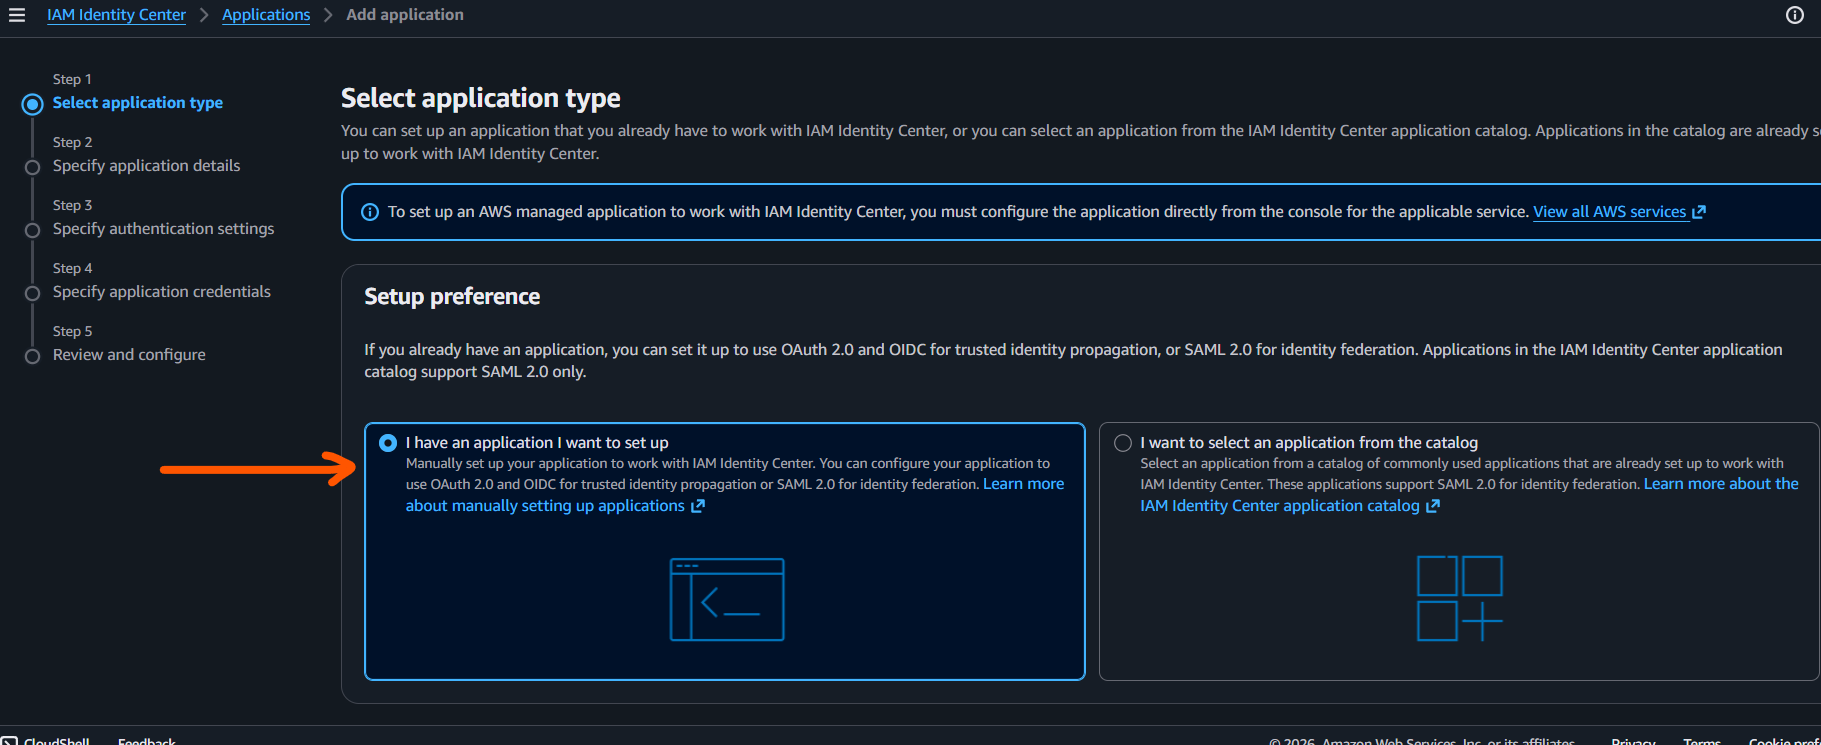
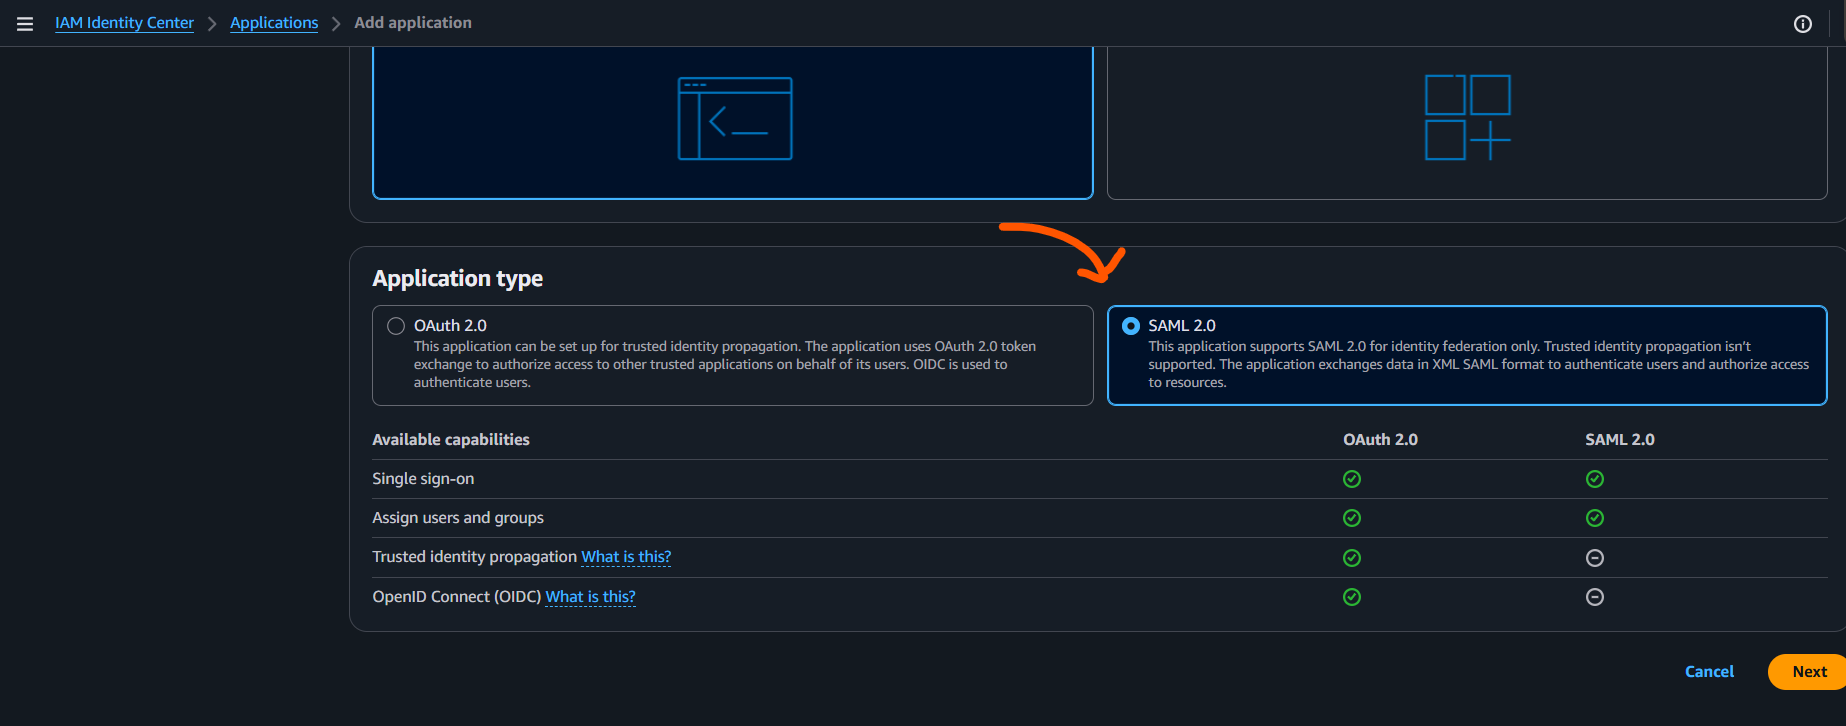
Choose I have an application I want to set up and select SAML 2.0.
Set:
- Application Name:
Client VPN - Description:
Application for AWS Client VPN authenticated with SSO
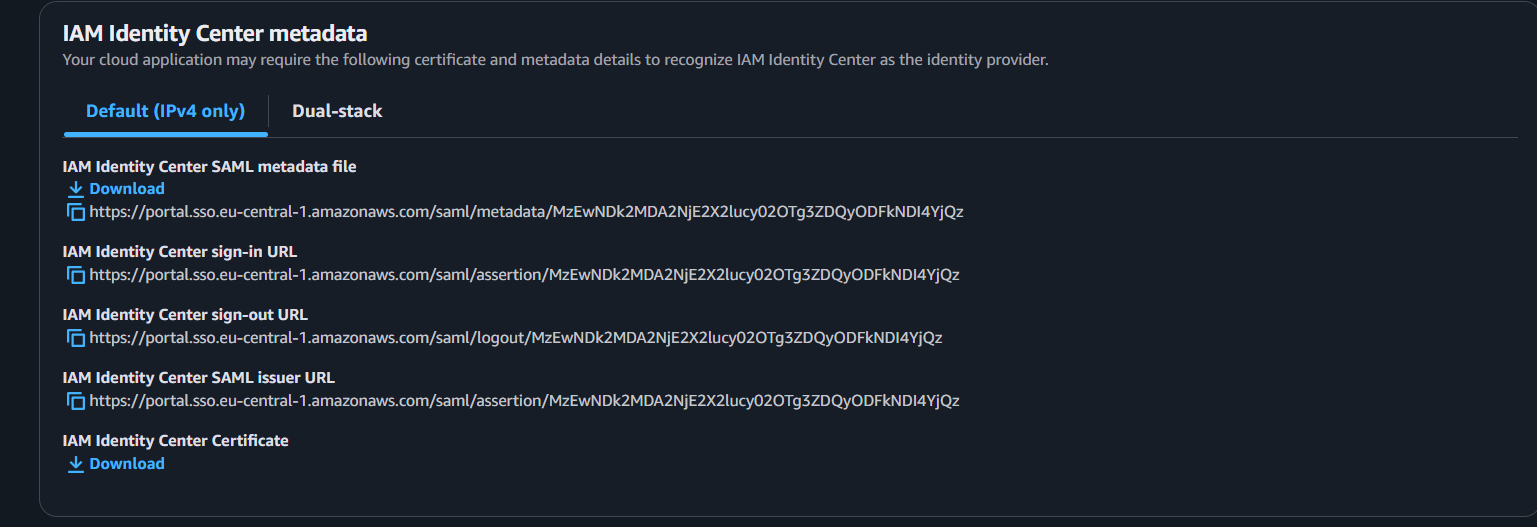
Select your IP stack (IPv4 in this guide) and download the IAM Identity Center SAML metadata file.
Set application metadata:
- Application SAML audience:
urn:amazon:webservices:clientvpn
- Application ACS URL:
http://127.0.0.1:35001
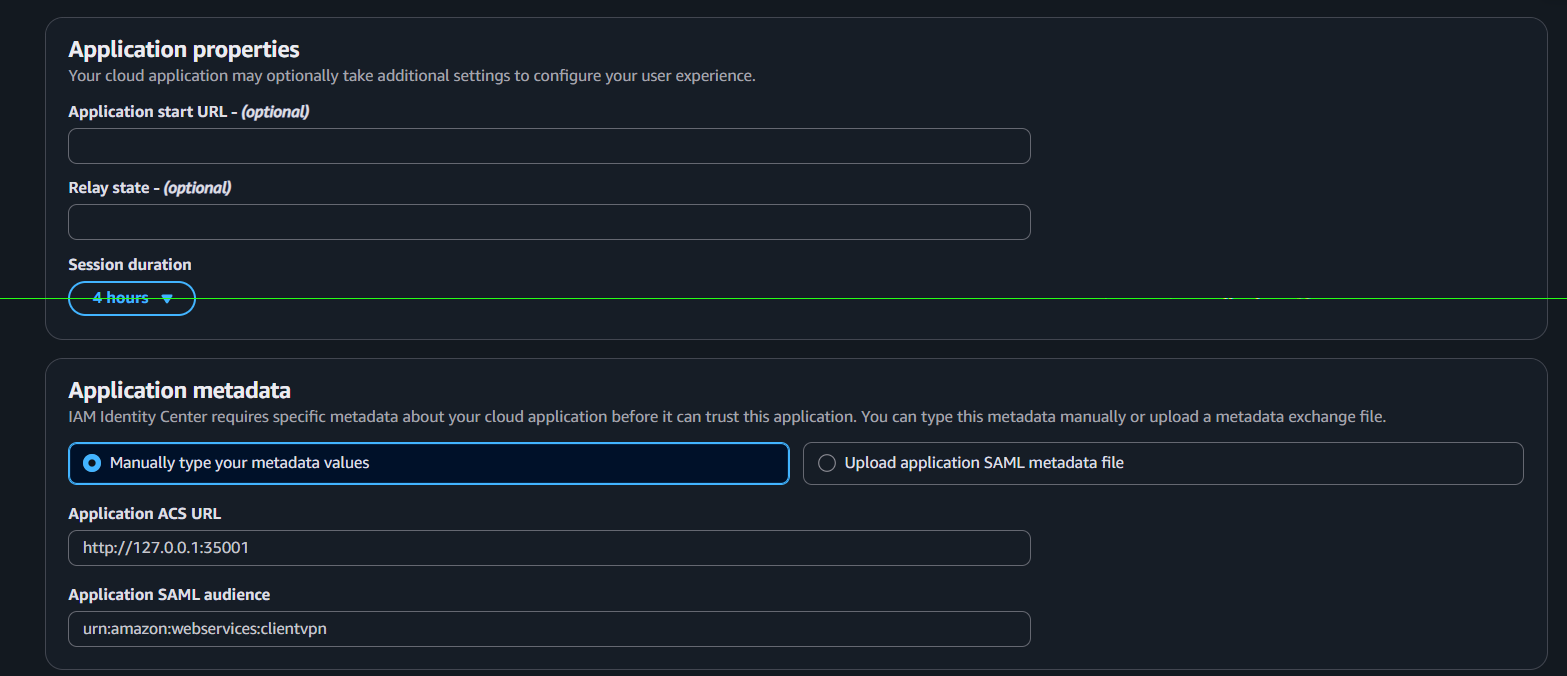
Leave Application Start URL and Relay State empty for now, then submit.
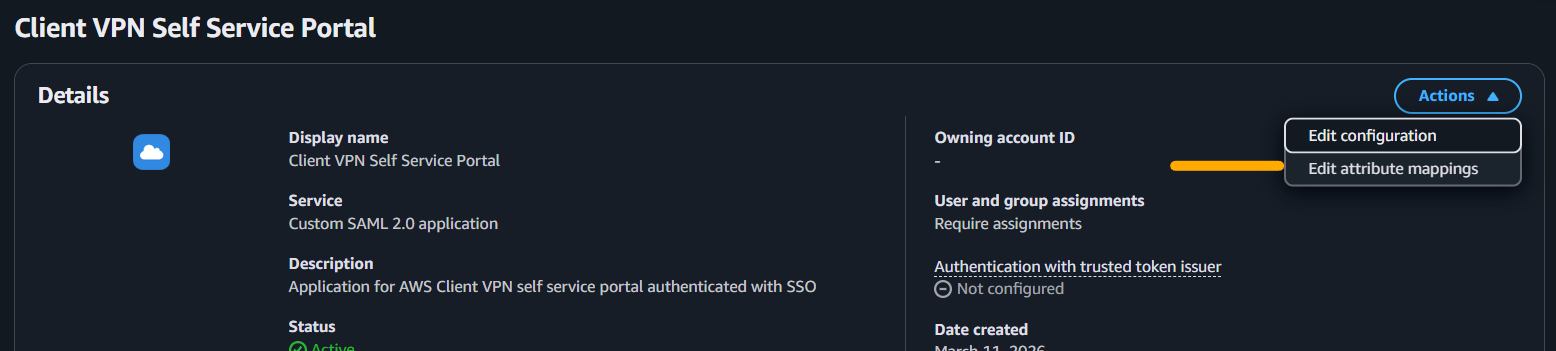
Open Actions -> Edit attribute mappings and add:
- Subject ->
\${user:email}with typeemailAddress memberOf->\${user:groups}with typeunspecified

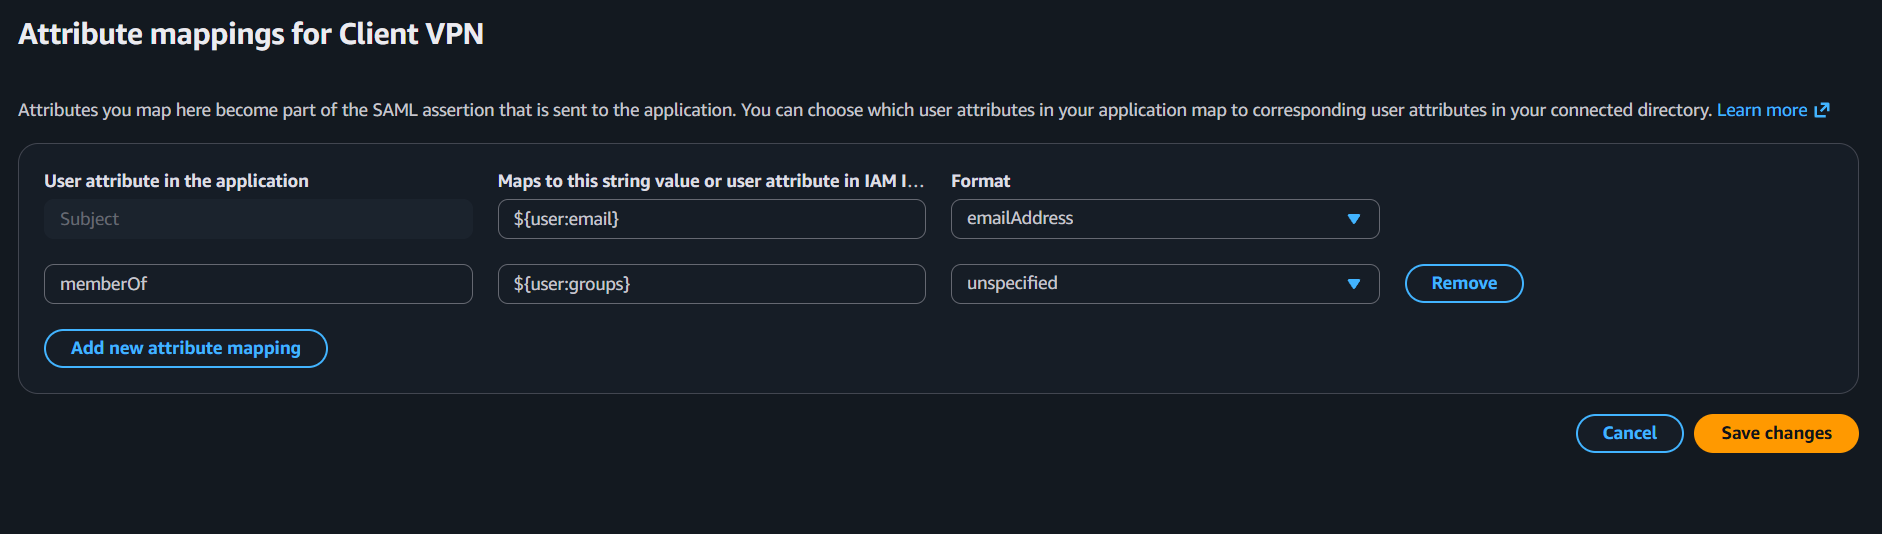
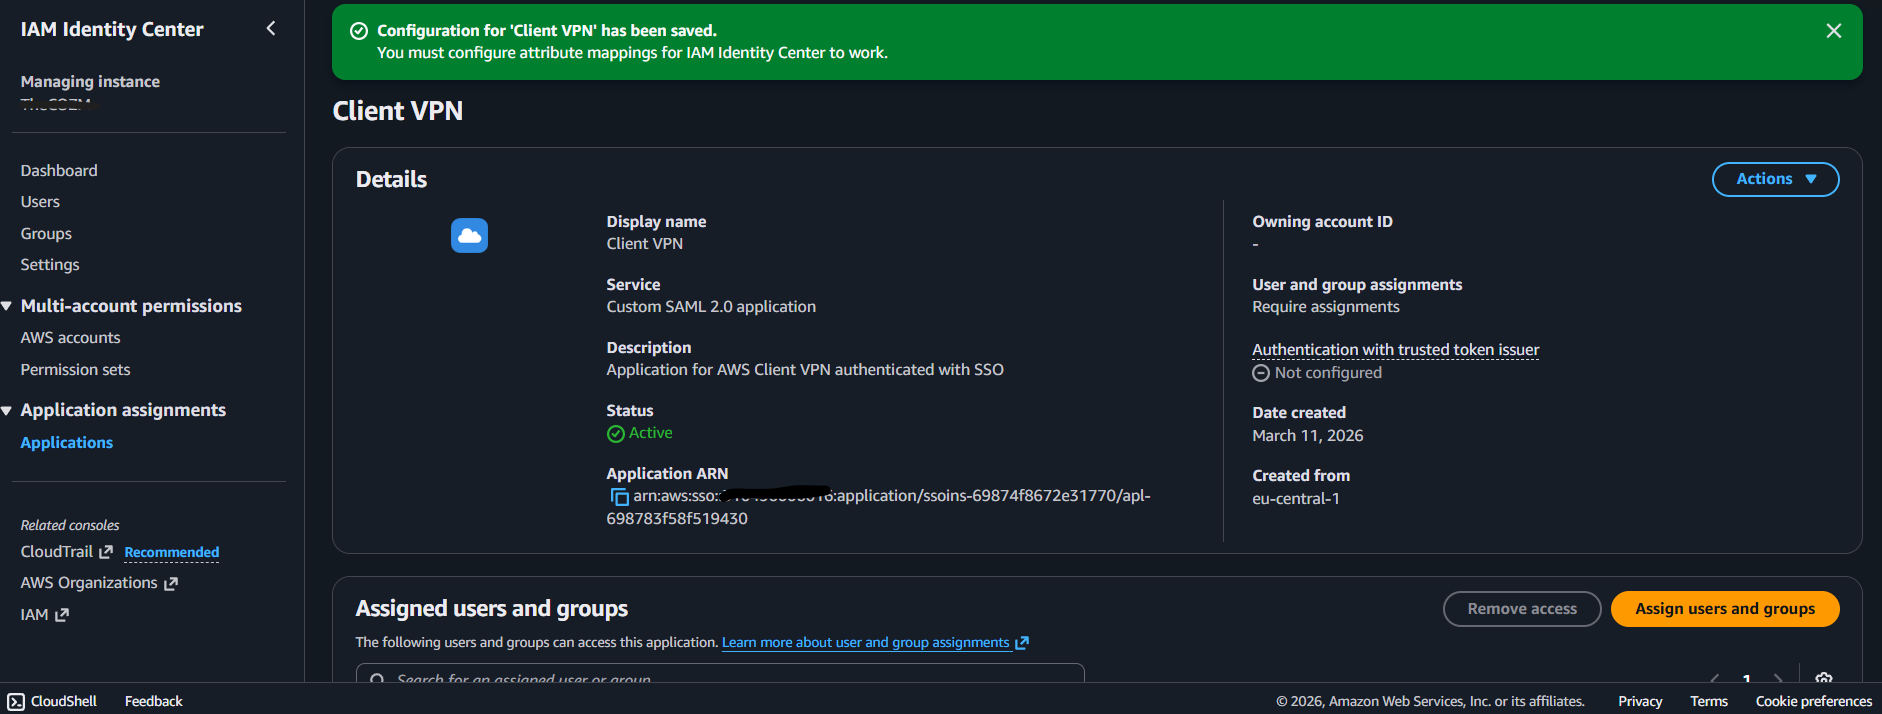
Checkpoint: Your Client VPN SAML app exists with the two mappings above.
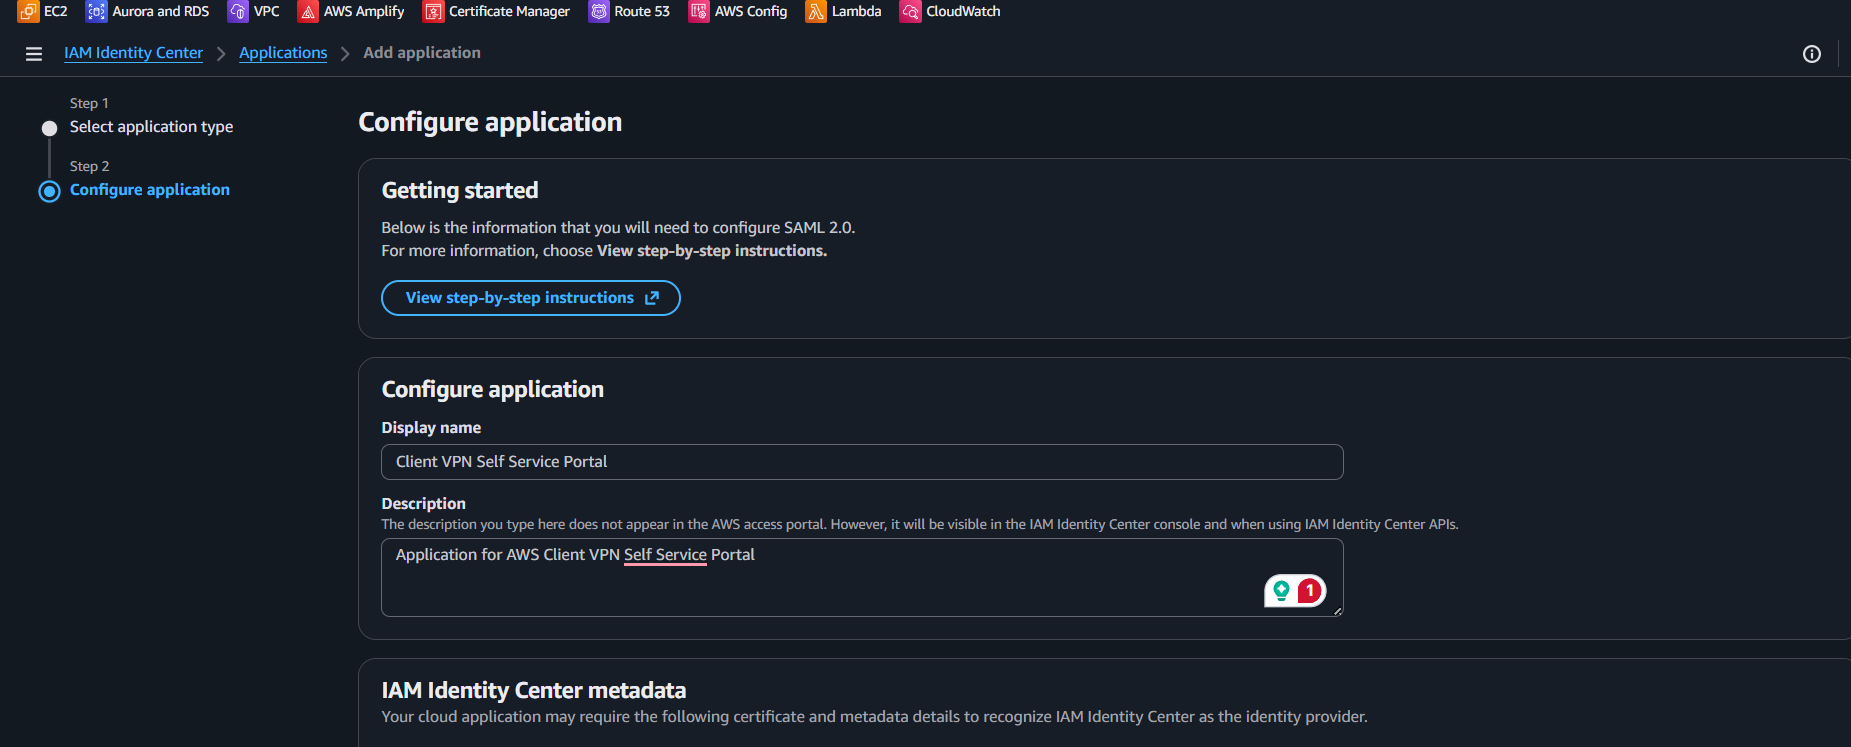
Step 2: Create SSO App for Self-Service Portal
Create another SAML 2.0 app in IAM Identity Center.
Set:
- Display Name:
Client VPN Self Service Portal - Description:
Application for AWS Client VPN self service portal authenticated with SSO

Use the same IP stack (IPv4 in this guide) and download this app's SAML metadata file as well.
Set:
- Application ACS URL:
https://self-service.clientvpn.amazonaws.com/api/auth/sso/saml
- Application SAML audience:
urn:amazon:webservices:clientvpn
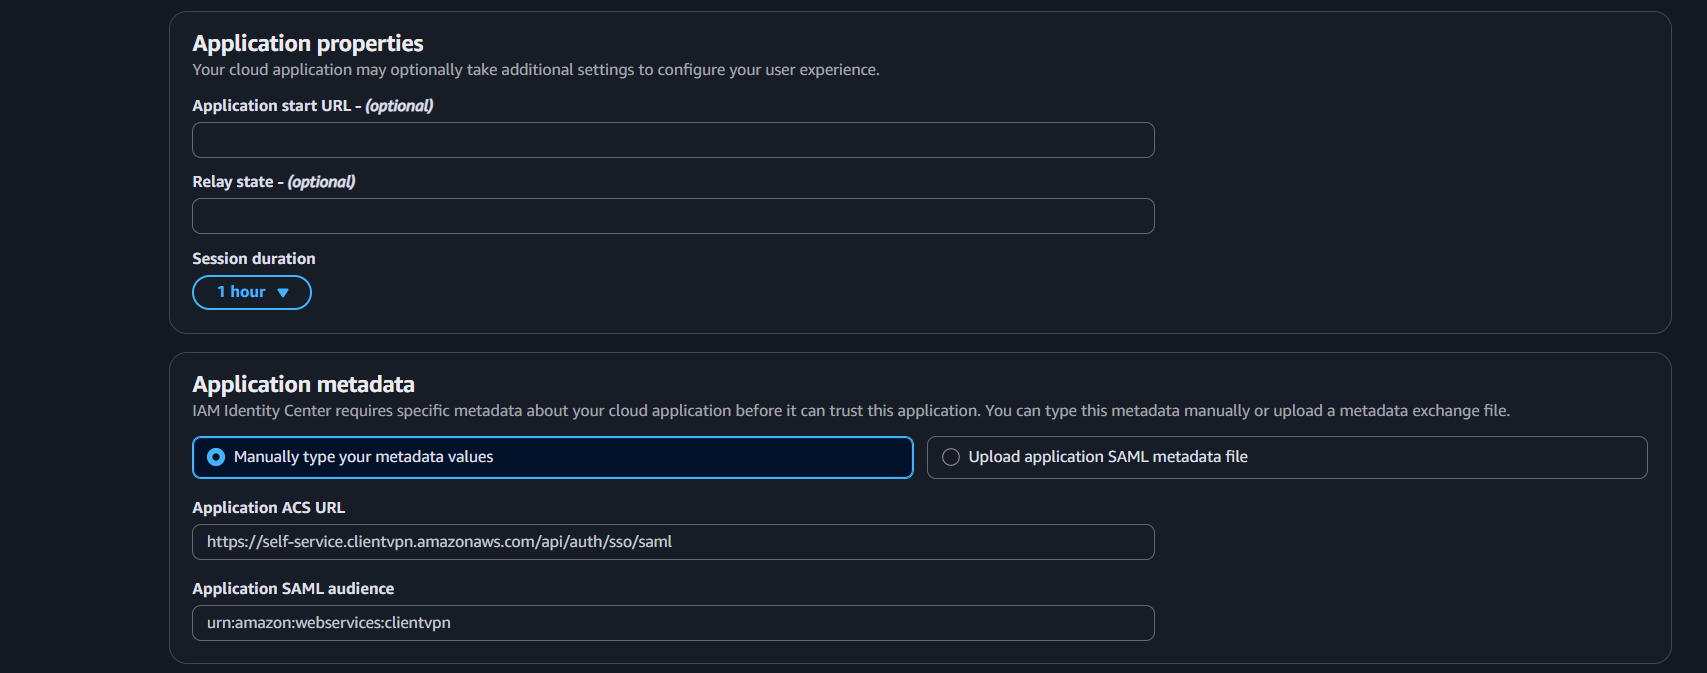
Submit.
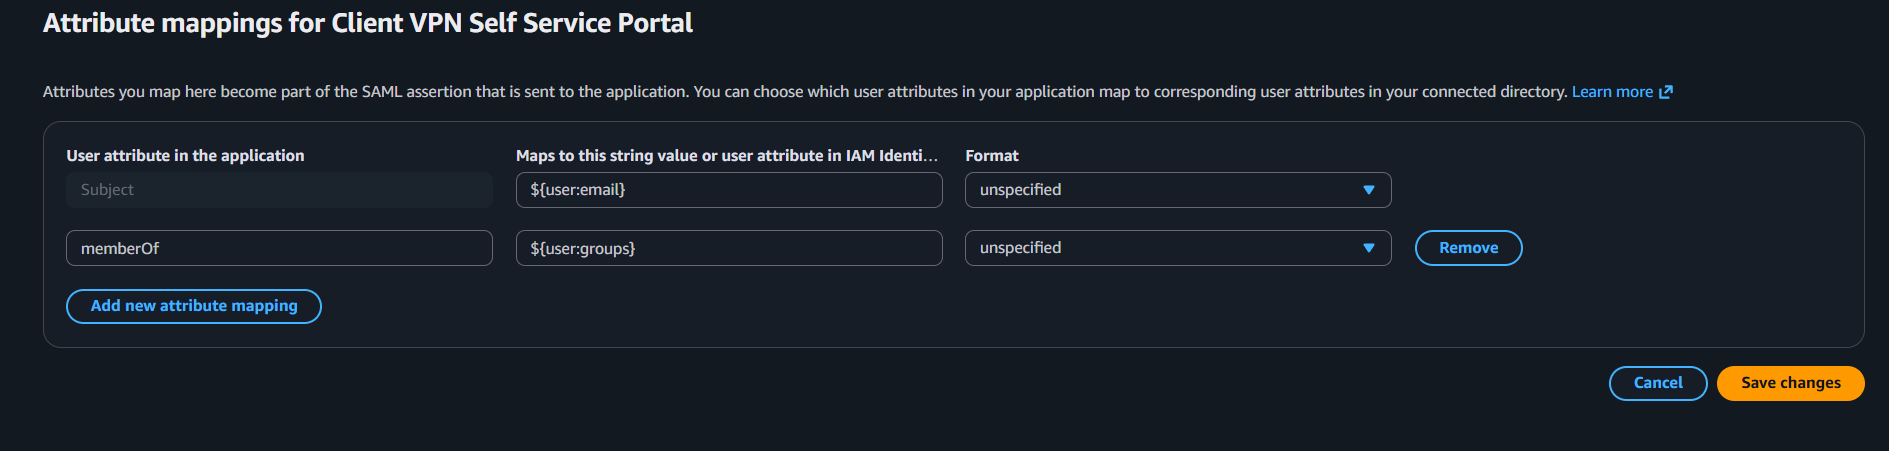
Add the same attribute mappings as Step 1:
- Subject ->
\${user:email}typeemailAddress memberOf->\${user:groups}typeunspecified
Checkpoint: Both SAML apps are created and mapped consistently.
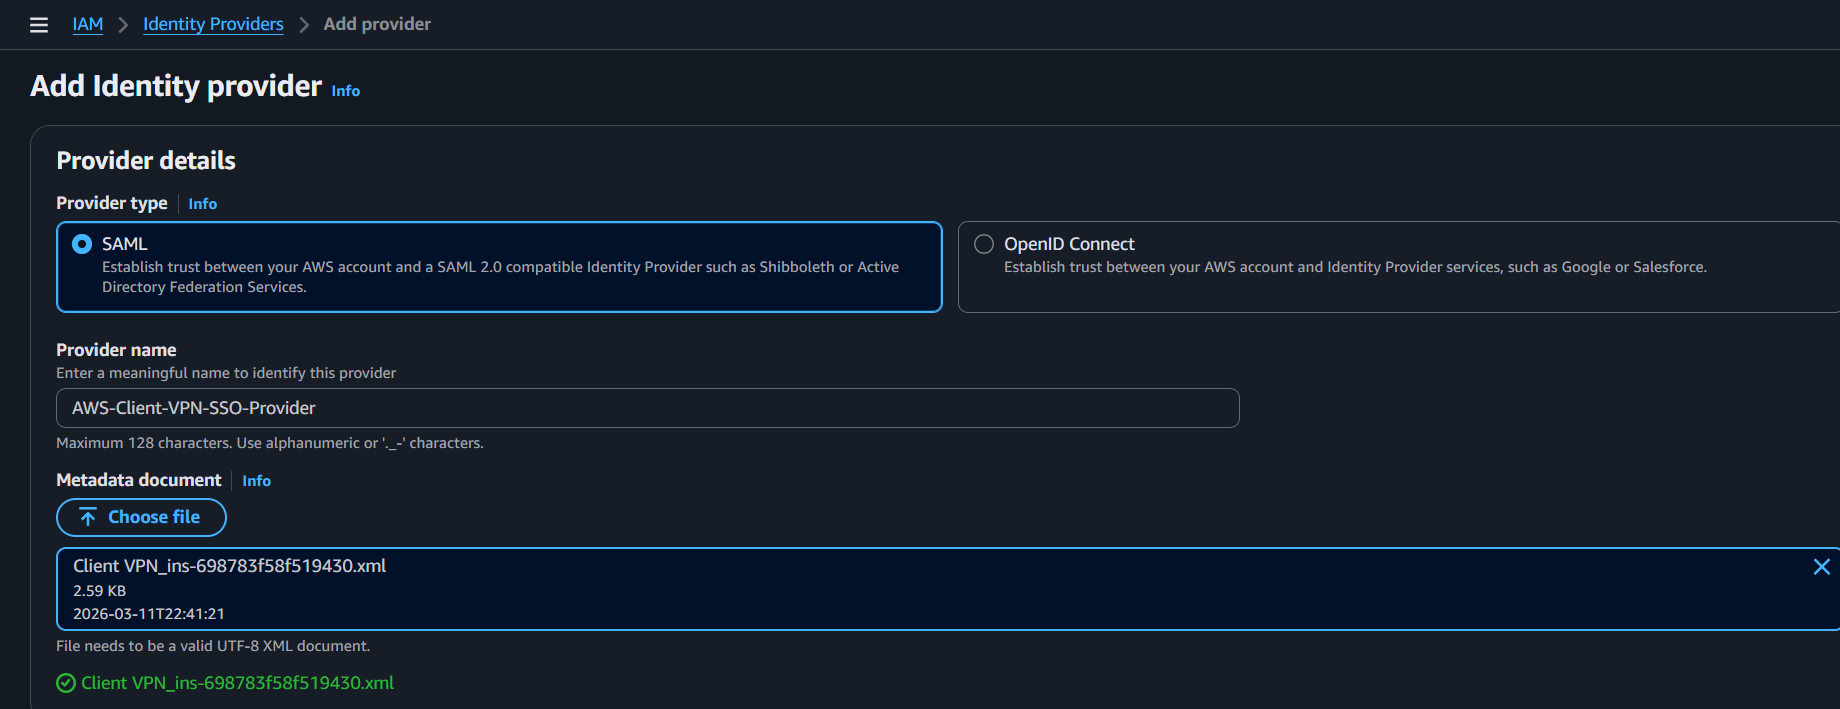
Step 3: Create IAM SAML Identity Providers
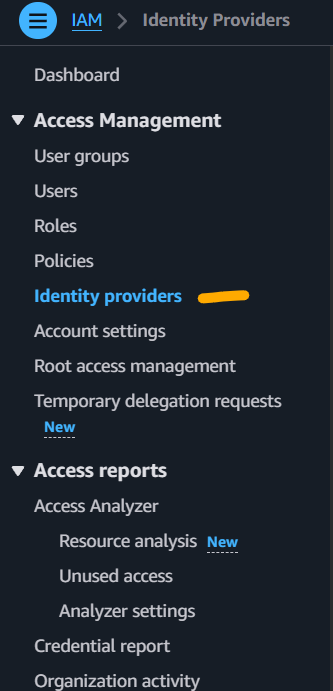
Go to AWS IAM -> Identity providers.
Create provider 1:
- Provider type:
SAML - Name:
AWS-Client-VPN-SSO-Provider - Metadata file: from the
Client VPNapp
Create provider 2:
- Provider type:
SAML - Name:
AWS-Client-VPN-Self-Service-Portal-SSO-Provider - Metadata file: from the self-service portal app
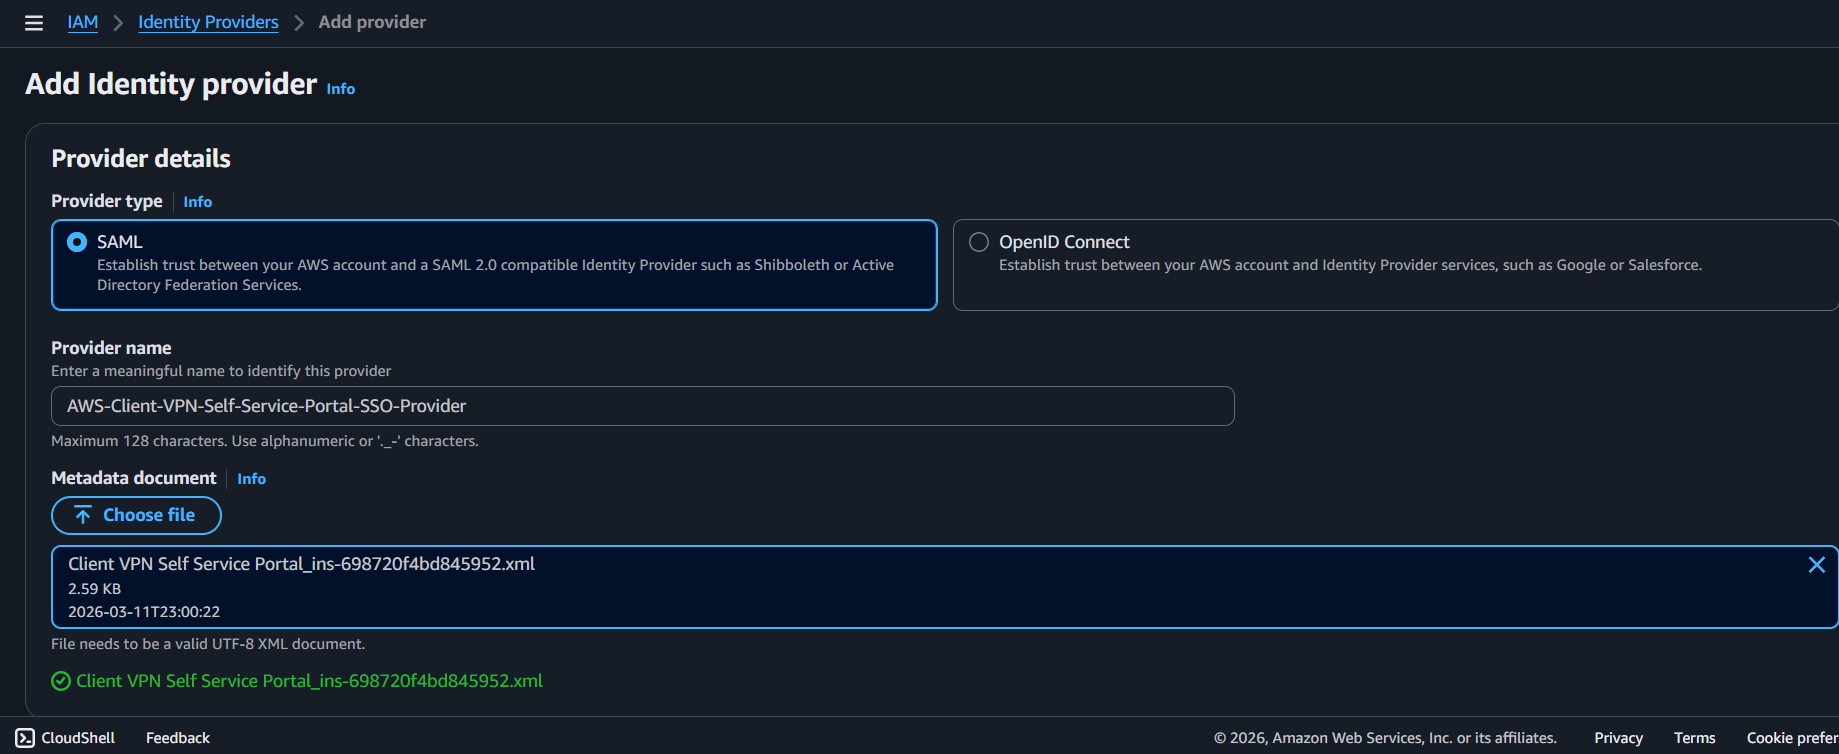
Checkpoint: IAM now has two SAML providers, one per app.
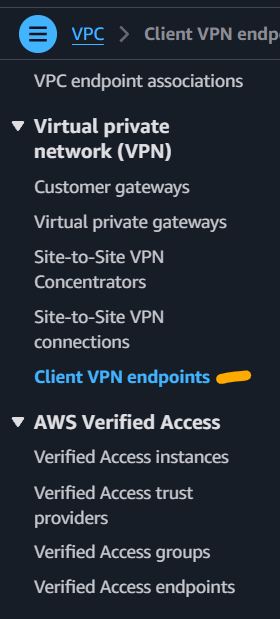
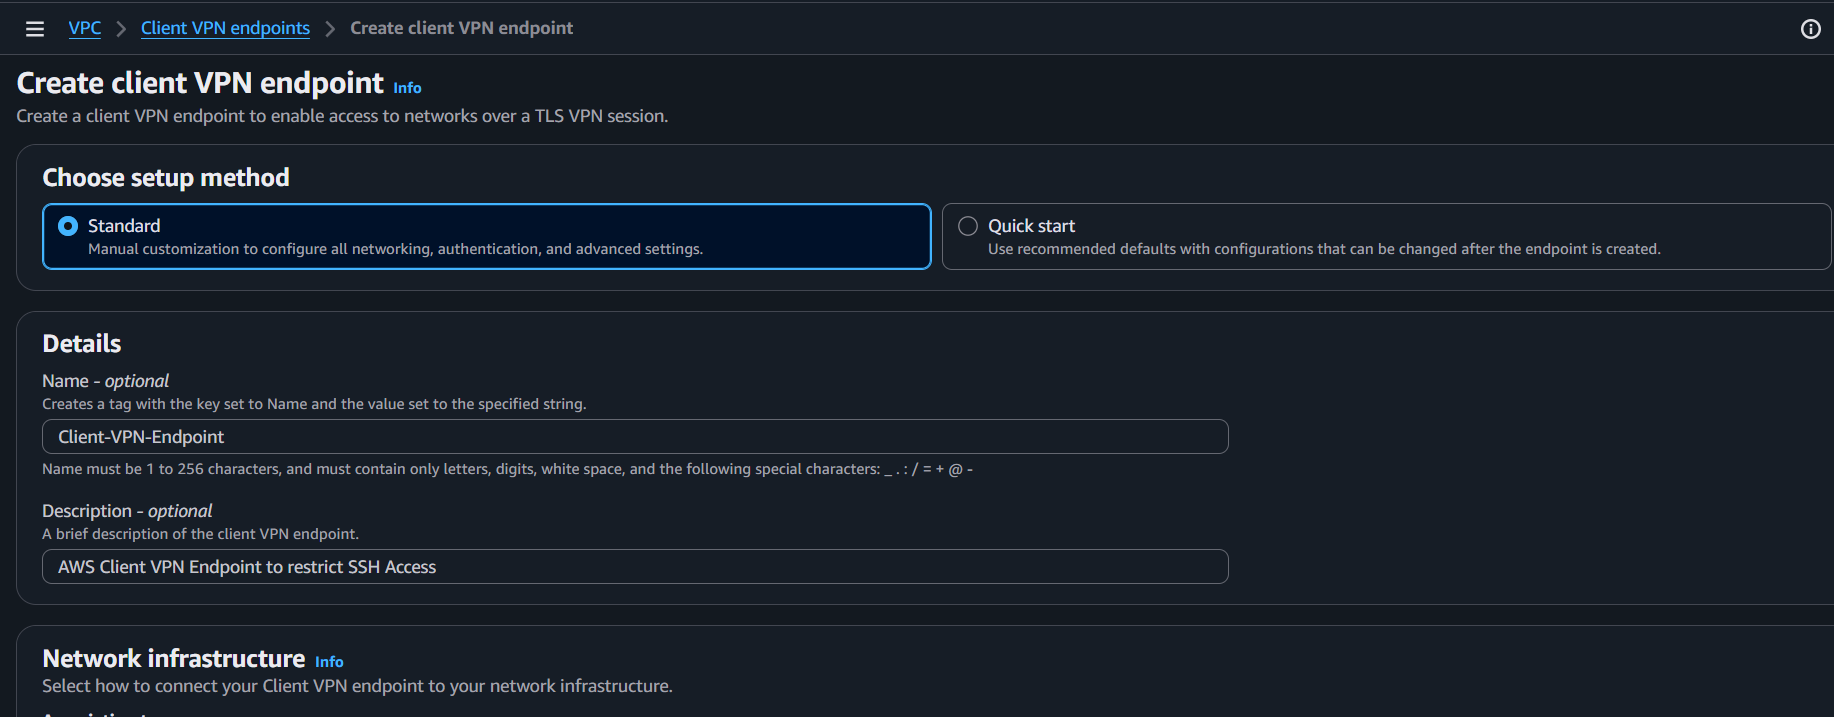
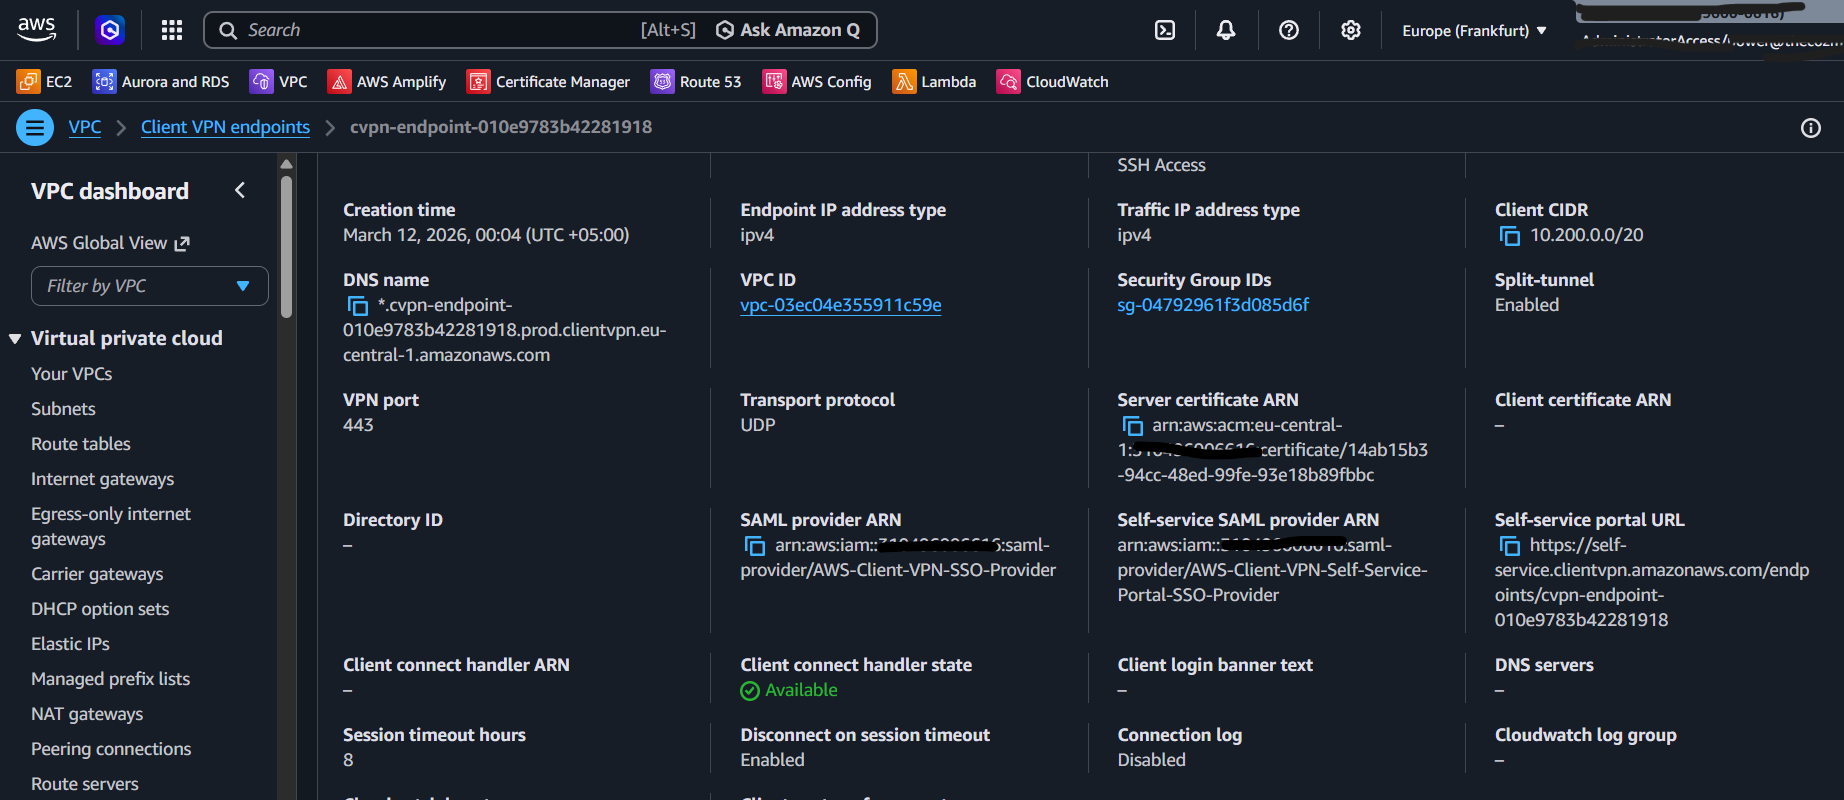
Step 4: Create Client VPN Endpoint
Go to VPC -> Client VPN Endpoints -> Create Client VPN Endpoint.
Before creating the endpoint, ensure your ACM certificate is ready (public cert for your chosen domain).
Recommended endpoint settings:
- Name tag:
Client VPN Endpoint - Description:
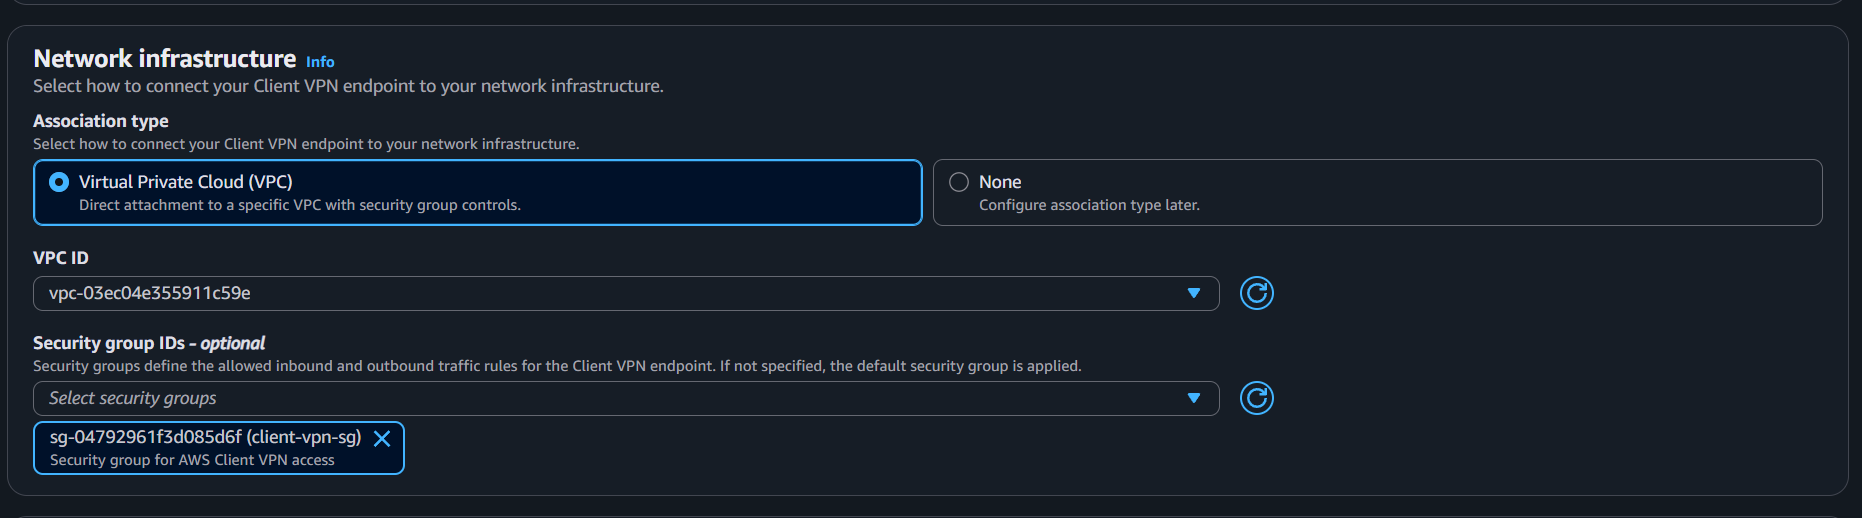
AWS Client VPN Endpoint with SSO authentication - VPC: your target VPC
- Security group: allow inbound
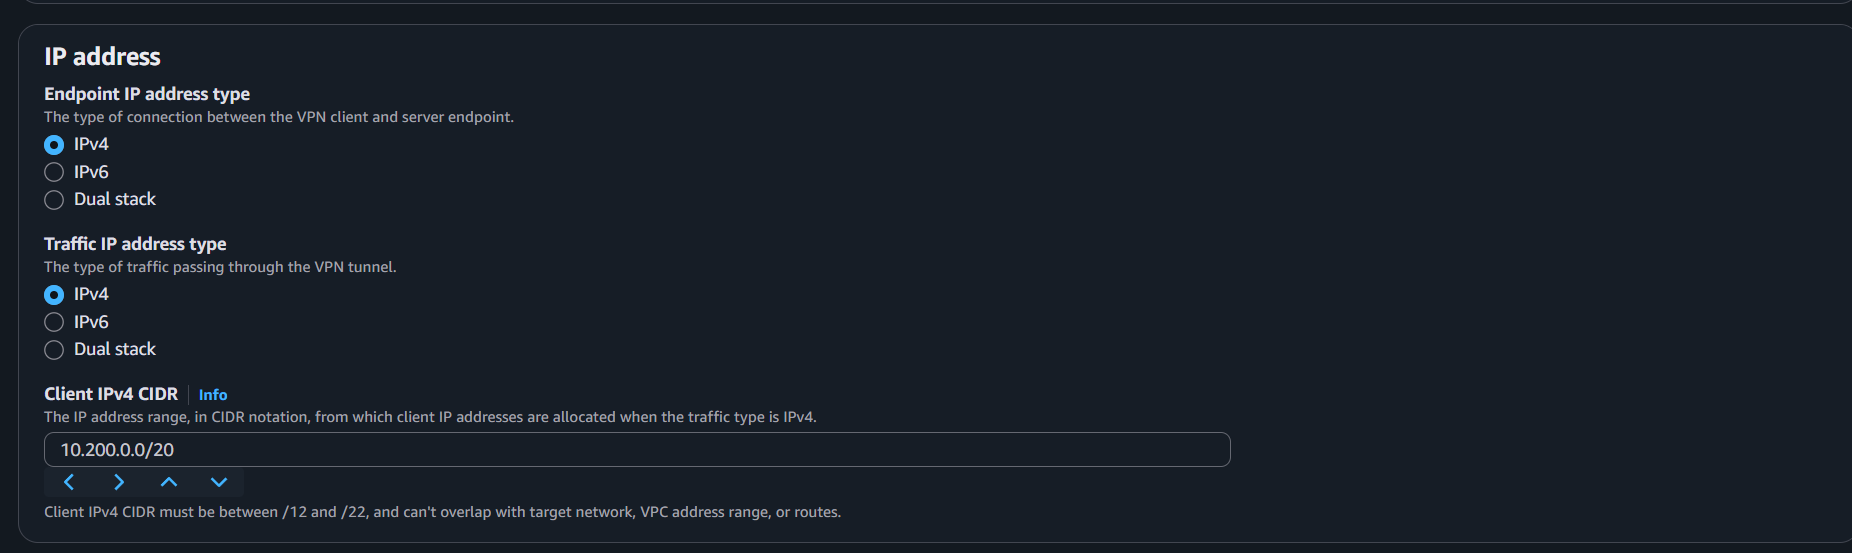
443 - Client IPv4 CIDR:
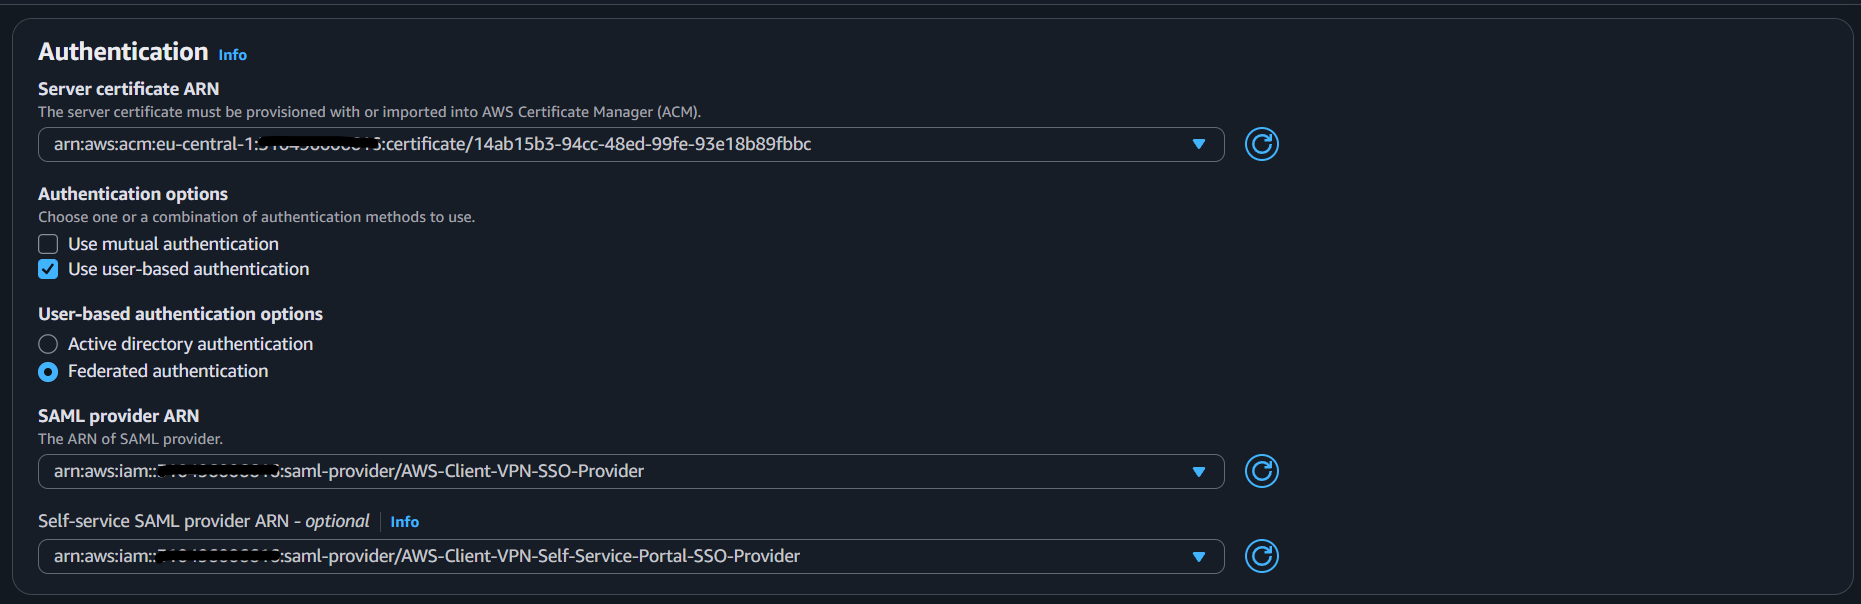
10.200.0.0/20 - Server certificate ARN: your ACM certificate
- Authentication:
- SAML provider:
AWS-Client-VPN-SSO-Provider - Self-service provider:
AWS-Client-VPN-Self-Service-Portal-SSO-Provider
- SAML provider:
- Client interface options:
- Enable self-service portal
- DNS: default (for this guide)
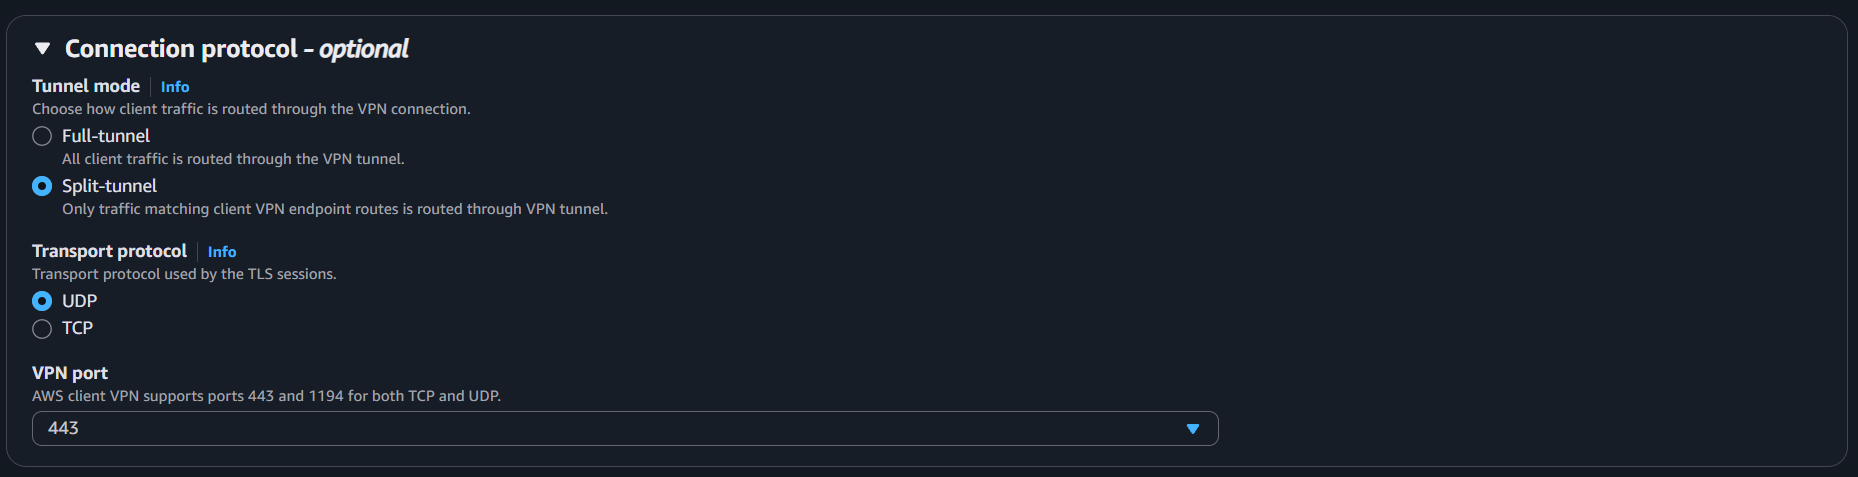
- Protocol:
- OpenVPN
- Split tunnel enabled
- UDP over
443
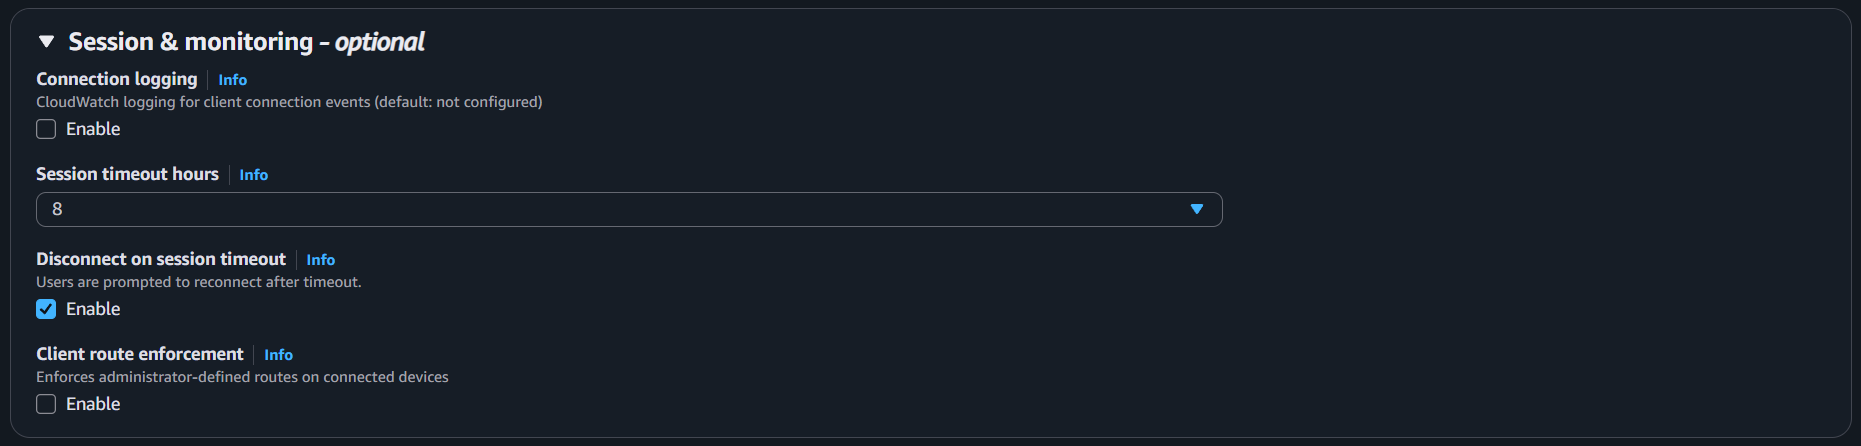
- Session monitoring:
- 8-hour timeout
- Disconnect on session timeout enabled

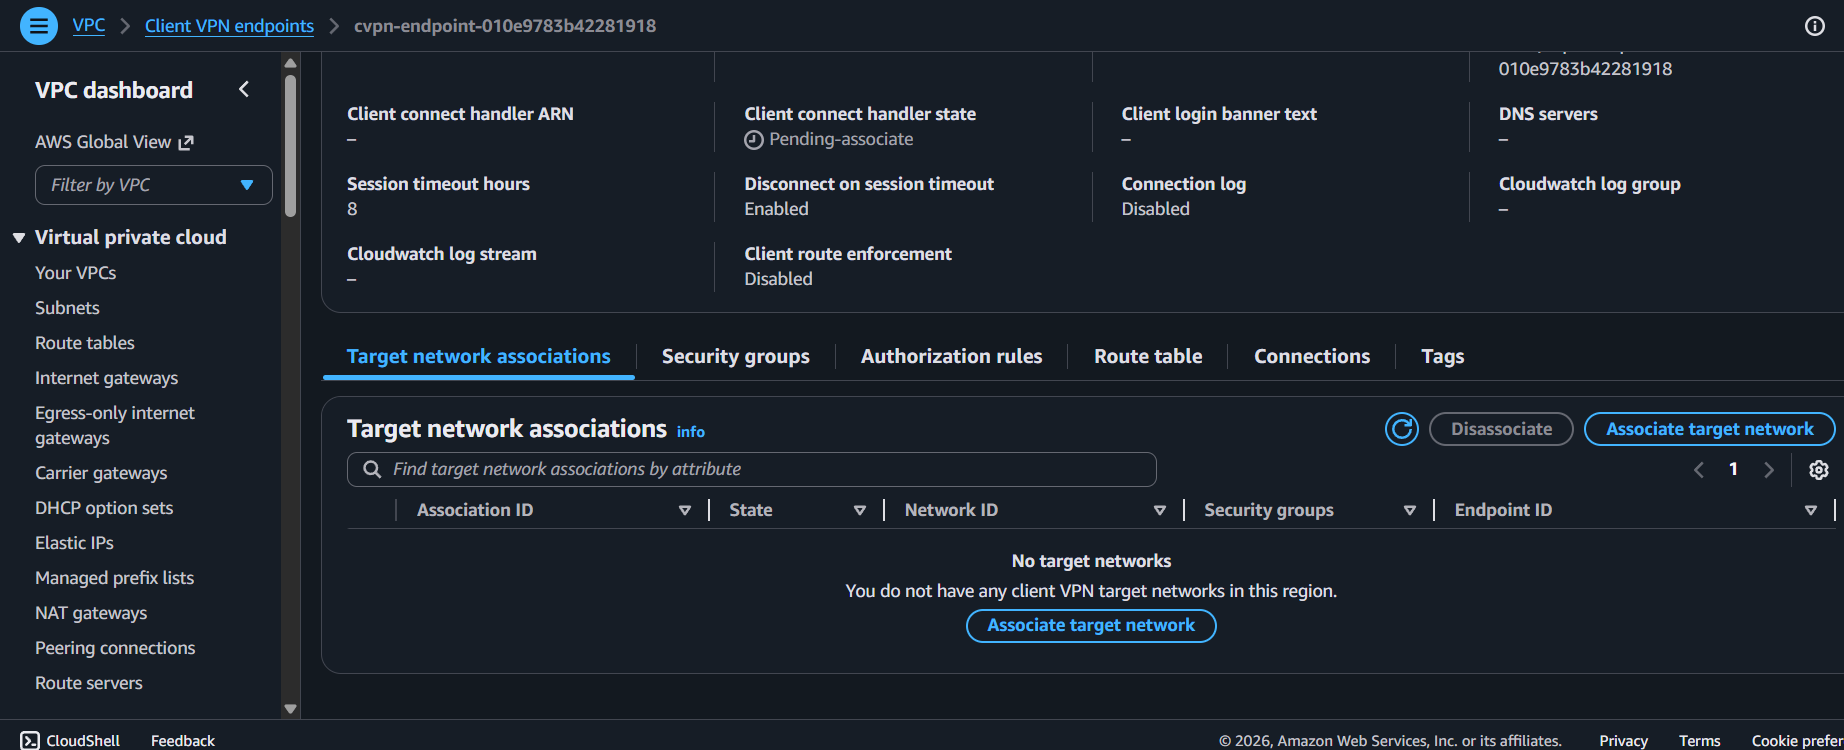
Create the endpoint. It starts in pending state.
Checkpoint: Client VPN endpoint exists and includes both SAML providers.
Step 5: Associate Target Network
Select the endpoint, open Associations, then click Associate Target Network.
Choose a subnet in the same VPC as the endpoint.
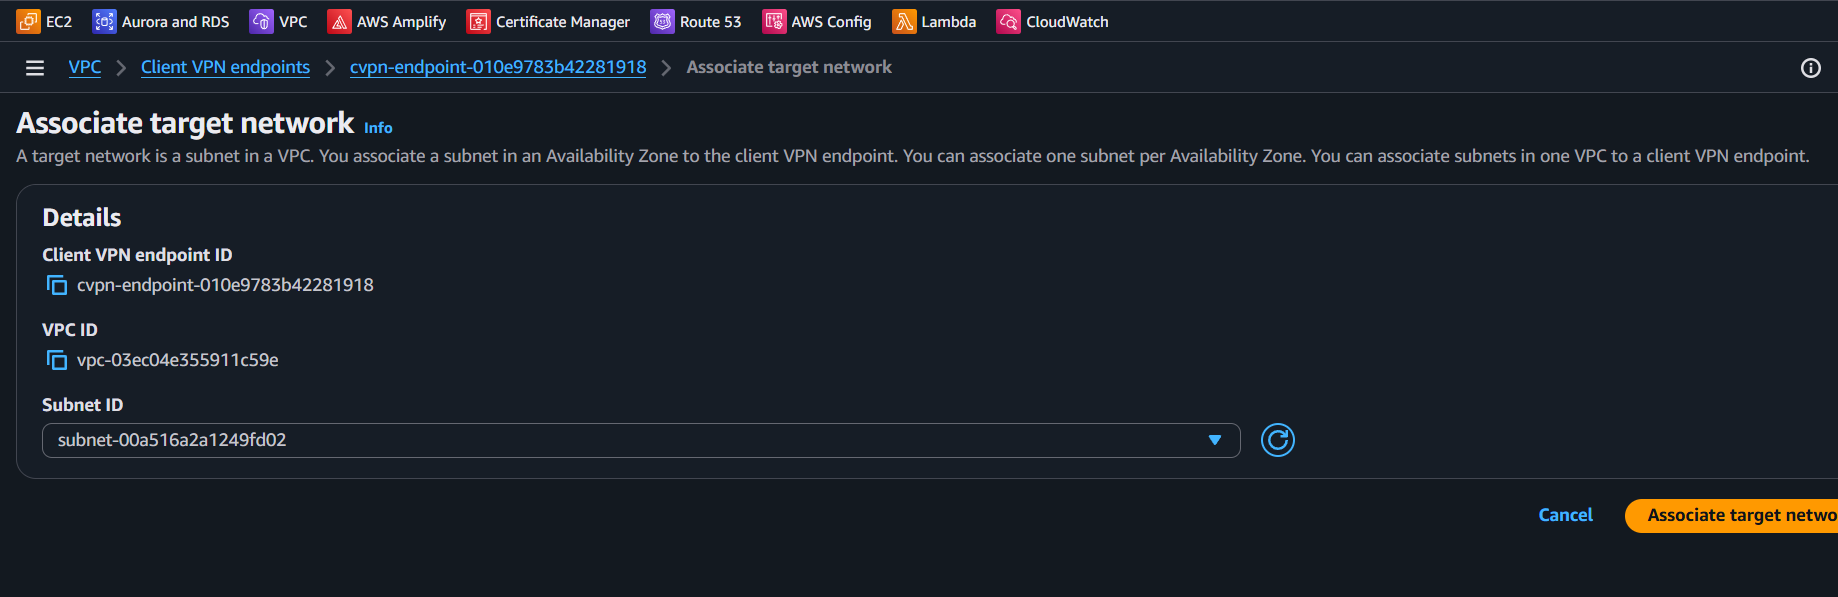
It can take about 10 minutes to become available.
Checkpoint: At least one subnet association is active.
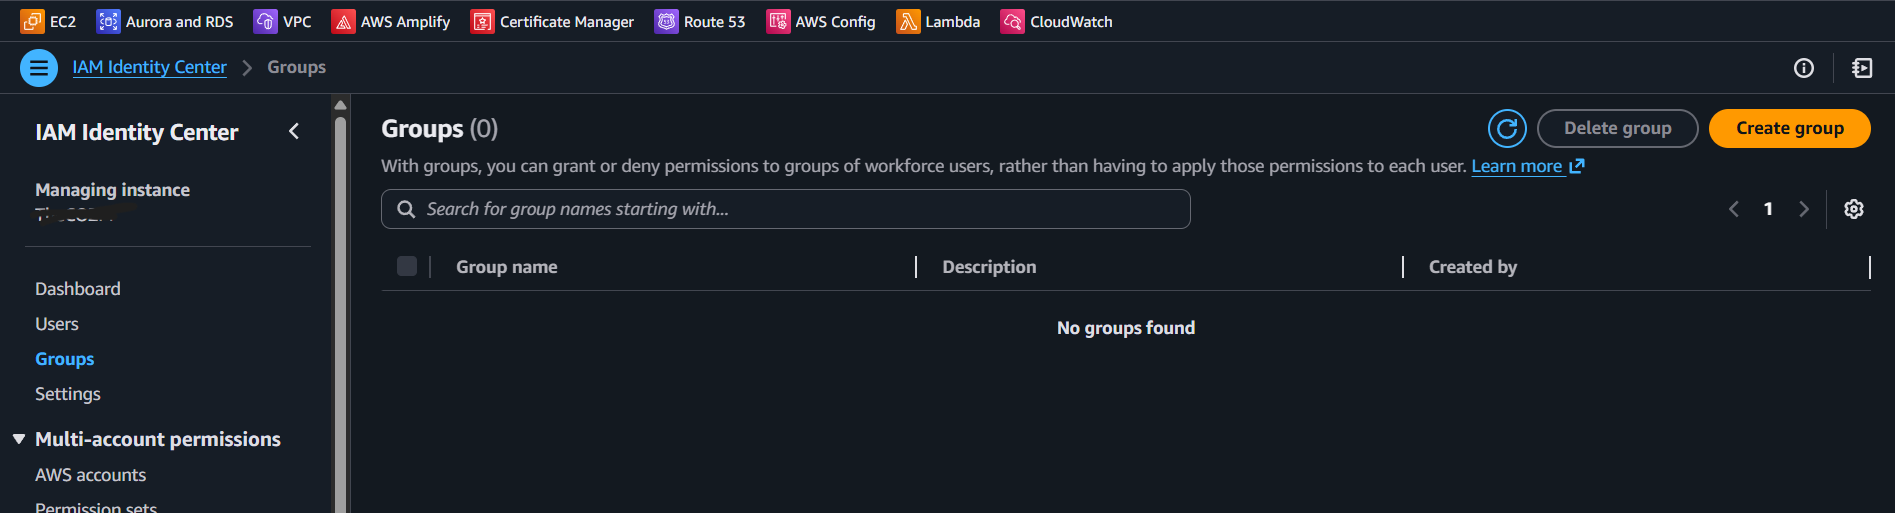
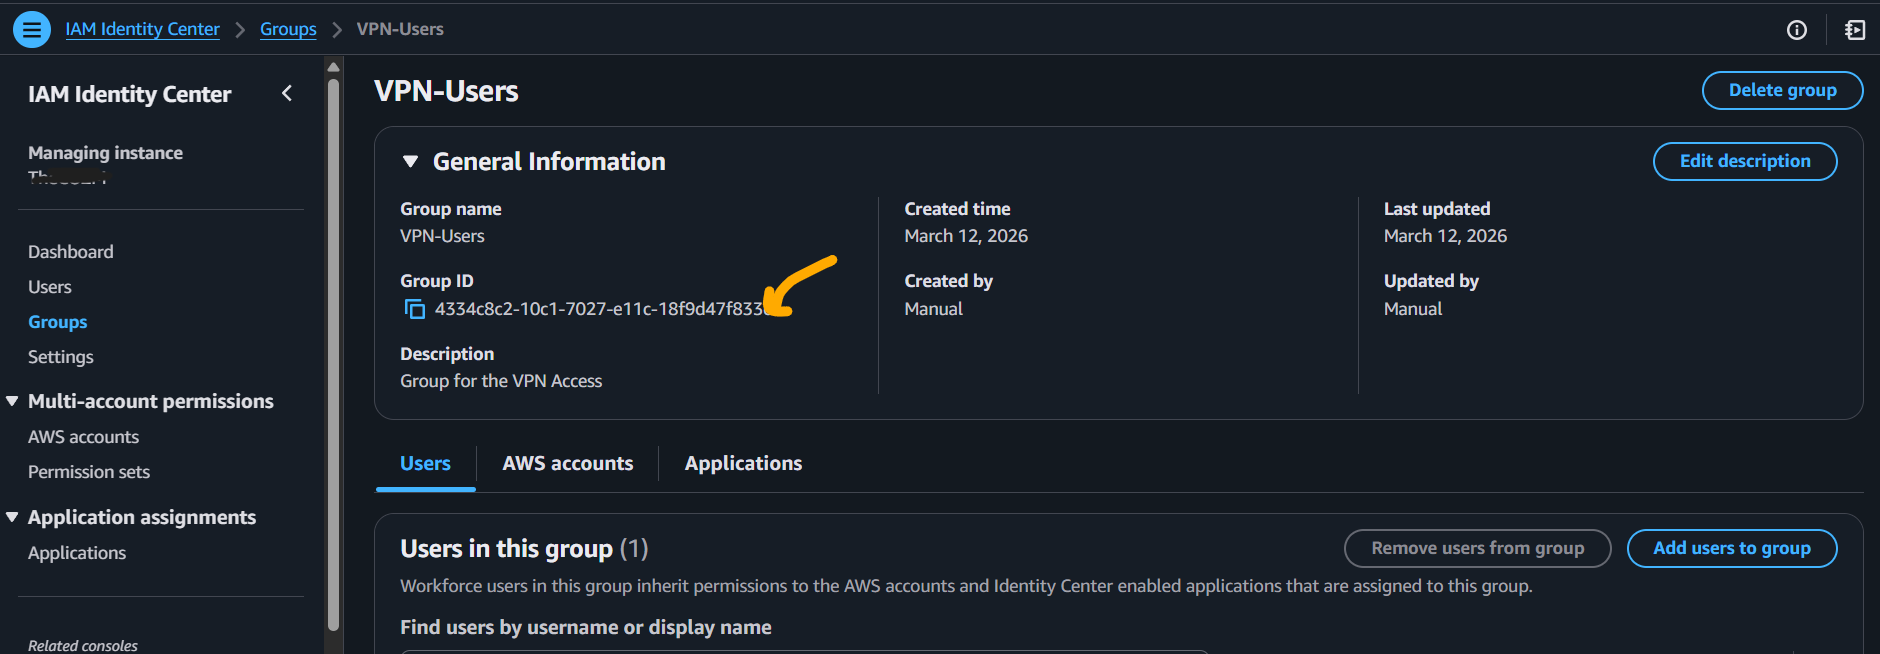
Step 6: Create Group and Authorization Rule
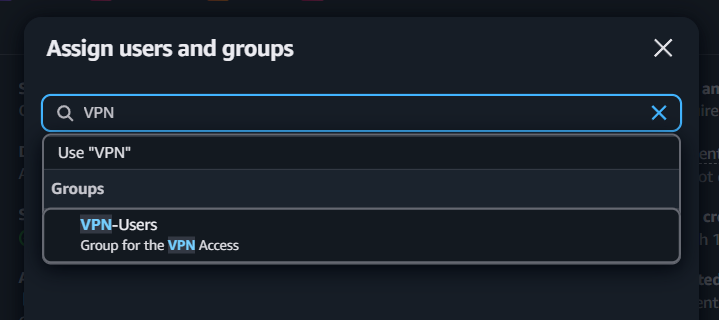
In IAM Identity Center, create a group for VPN users.
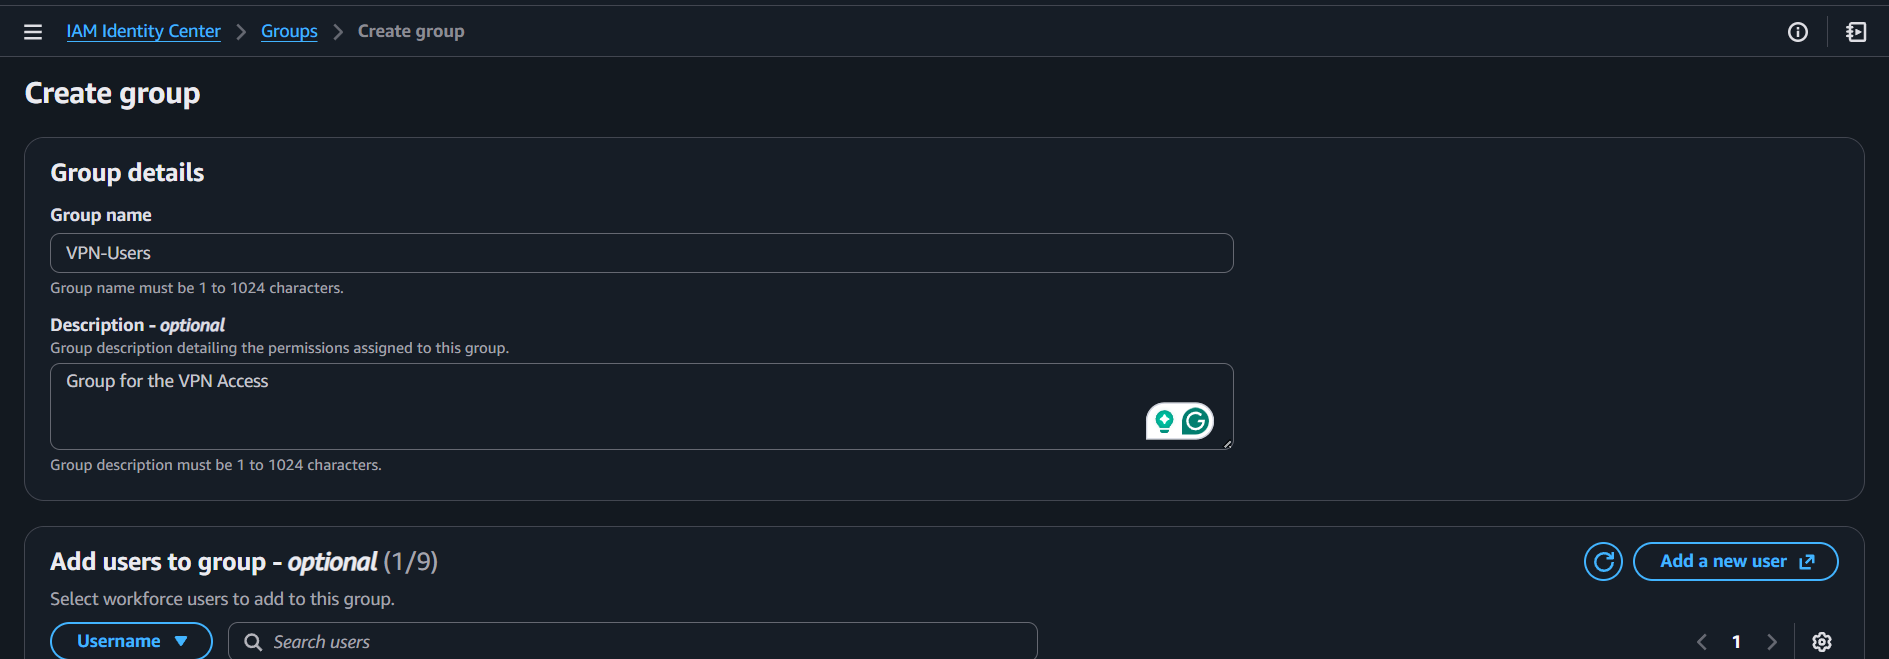
Open the group and copy its group ID.
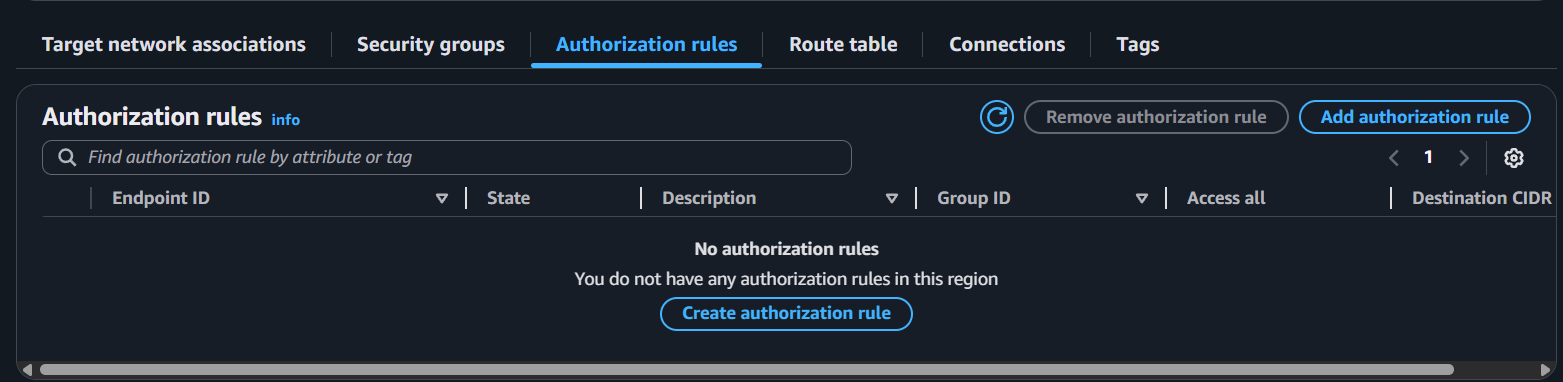
Back in Client VPN endpoint, open Authorization rules -> Create authorization rule.
Set:
- Destination network: your VPC CIDR
- Grant access:
Allow access to users in a specific access group - Access group ID: the group ID copied above
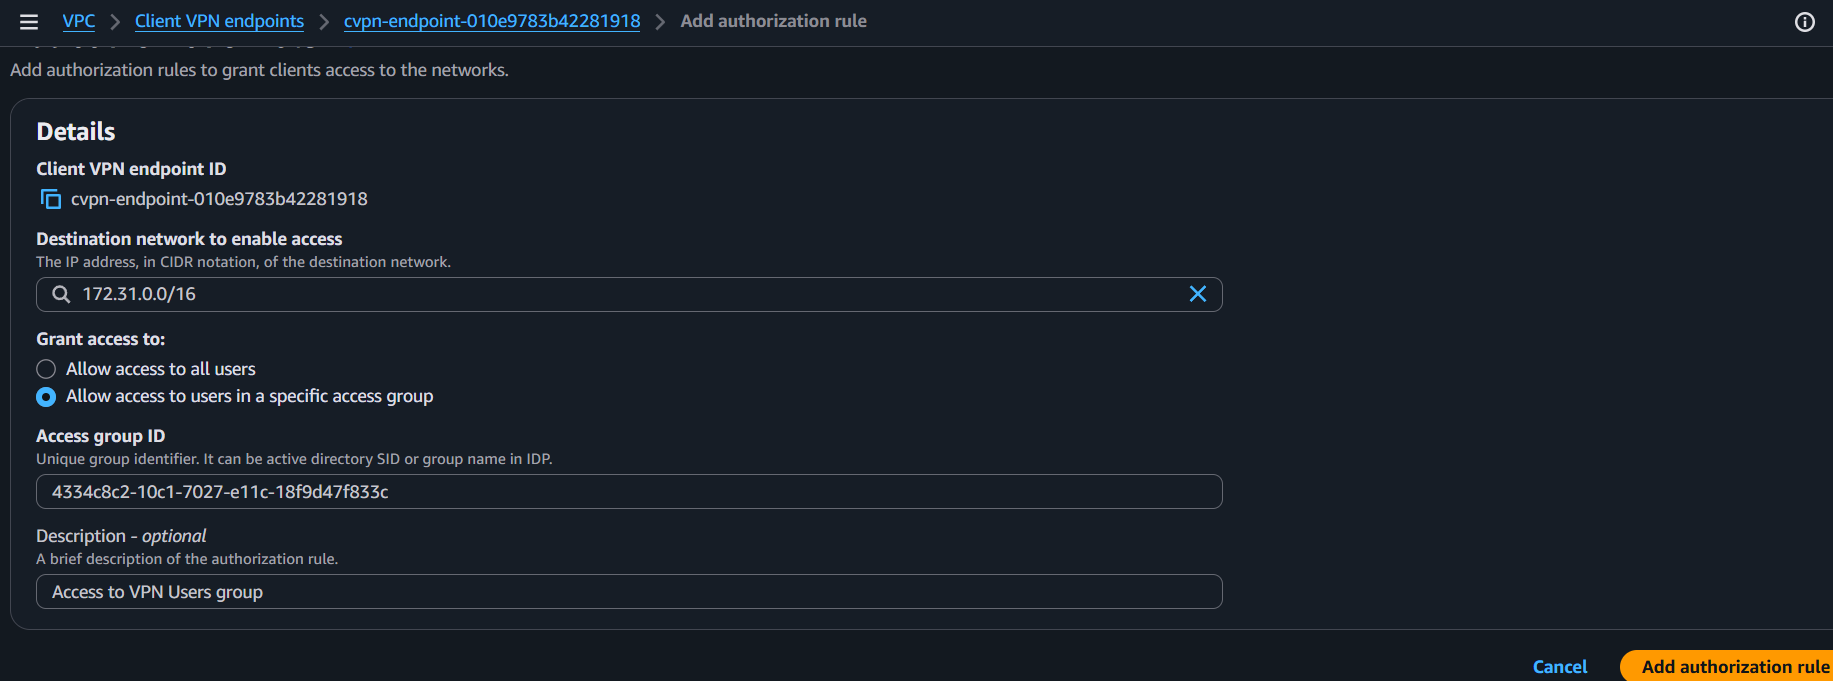
Checkpoint: Only users in the selected Identity Center group can access VPC networks.
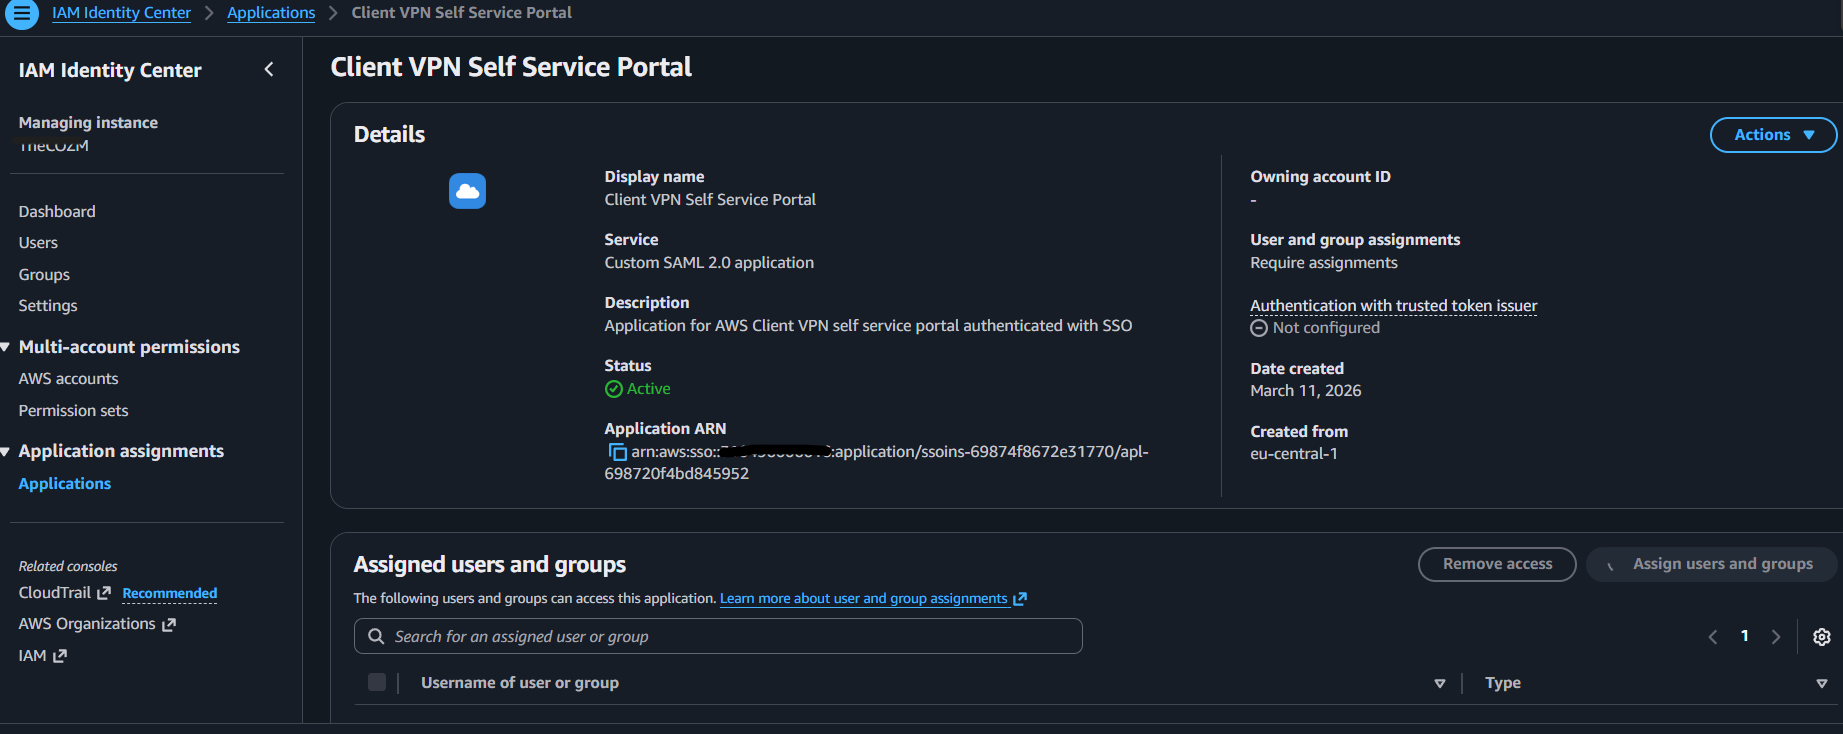
Step 7: Assign Applications to Group
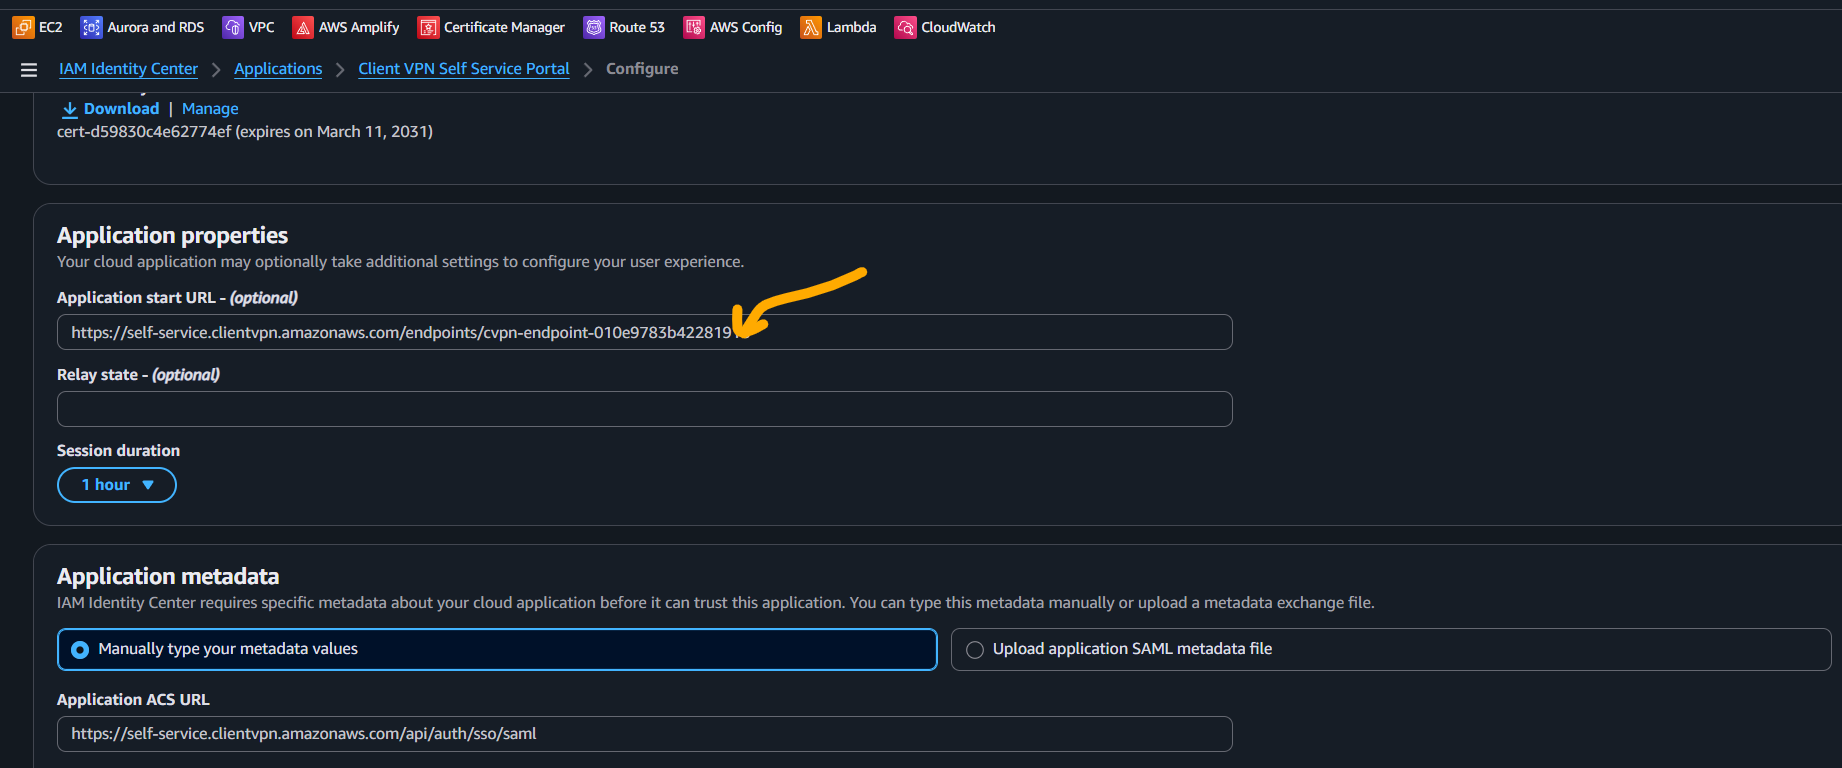
From endpoint details, copy the self-service portal URL.
Go to the Client VPN Self Service Portal app and set:
- Application Start URL: the copied self-service portal URL
Now assign both apps to the VPN group:
Client VPNClient VPN Self Service Portal
Users in that group will now see both apps in the IAM Identity Center access portal.
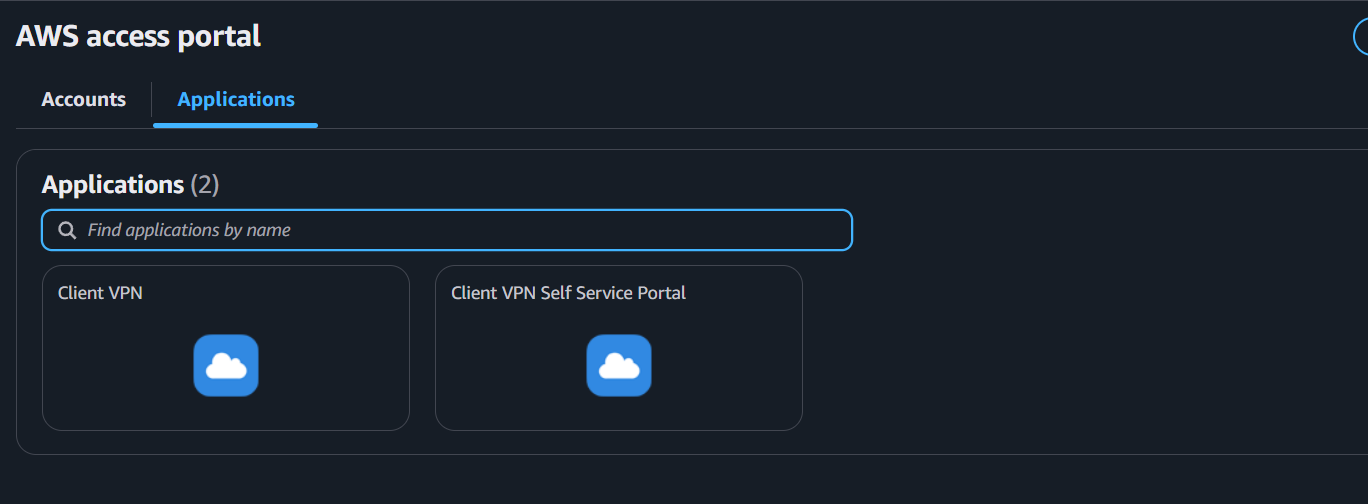
Checkpoint: Group assignment completed for both applications.
Step 8: End-User Connection Flow
User opens the Client VPN Self Service Portal app and downloads the client configuration.
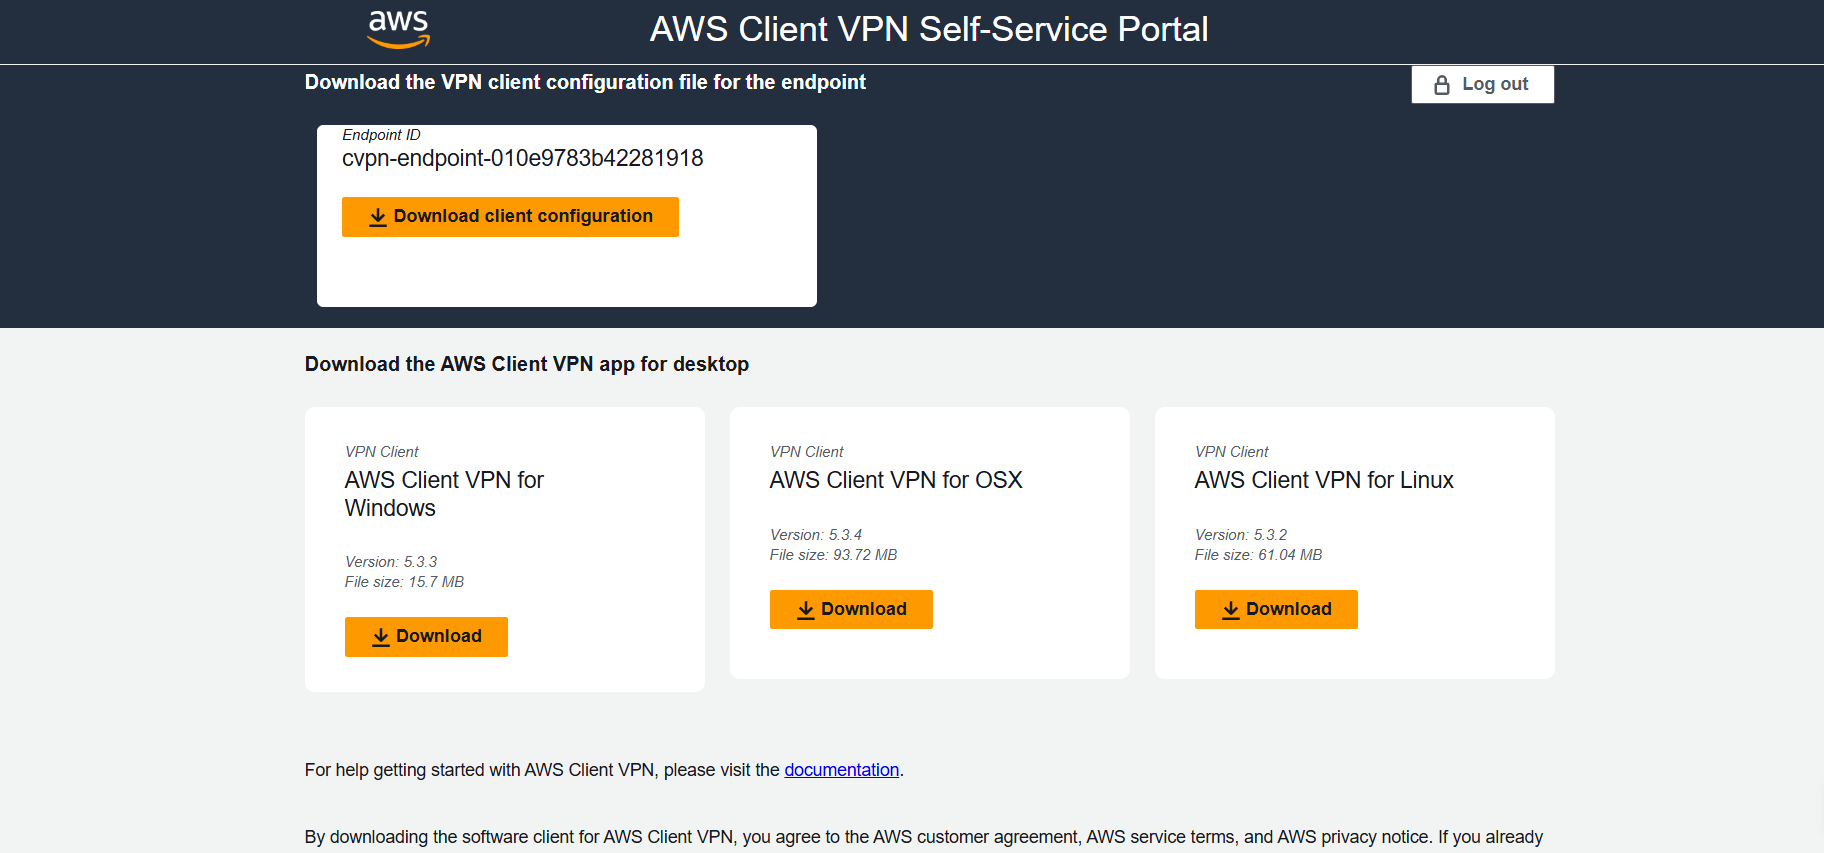
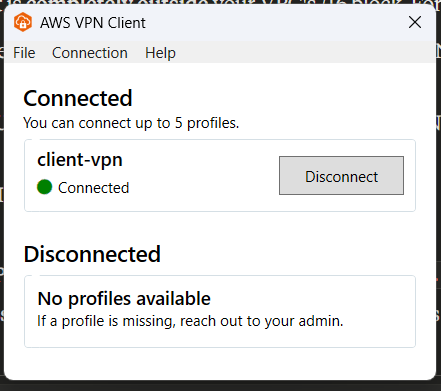
In AWS Client VPN desktop app:
- Open Manage Profiles
- Add profile
- Upload downloaded config file
- Save and connect

Browser-based SSO opens automatically. After successful sign-in, VPN connects.
Test access to private resources (for example, ping a private IP in the VPC).
Checkpoint: End-user can authenticate via SSO and access private VPC resources.
Validation Checklist
- Endpoint status is
available - At least one target network association is active
- Authorization rule targets correct VPC CIDR
- Rule uses the intended Identity Center group ID
- Both SAML apps are assigned to the user group
- User can download config from self-service portal
- User can connect from AWS Client VPN desktop client
- User can access expected private resources
Troubleshooting
Users cannot see applications in IAM Identity Center portal
- Confirm group assignment on both apps.
- Confirm users are members of the assigned group.
- Re-check app assignment propagation (can take a few minutes).
SSO login works but VPN does not connect
- Verify endpoint is in
availablestate. - Verify target network association is complete.
- Confirm security group allows required traffic.
- Confirm local network/firewall is not blocking UDP 443.
Connected but cannot access VPC resources
- Validate authorization rule destination CIDR.
- Verify route tables and NACLs in target subnet path.
- Check resource security groups allow client CIDR range.
- Confirm split-tunnel behavior matches expected routes.
FAQ
Do I need two SAML apps?
Yes. One is for Client VPN authentication and one is for the self-service portal.
Can I use a different client CIDR?
Yes, as long as it does not overlap with existing VPC/on-prem ranges.
Do I have to use self-service portal?
It is optional but strongly recommended for easier user onboarding and config distribution.
Final Notes
This setup gives you identity-based VPN access with centralized user and group management. For production, consider tightening security groups, adding monitoring/alerts, and documenting your network access policy for each user group.